Showing posts with label Camping. Show all posts

Monday, December 16, 2013

Cabin Camping at Camp Bomazeen

Recently, I had the opportunity to lead a group of Boy Scouts from Troop 817 on a cabin camping excursion to Camp Bomazeen, a Pine Tree Council camp on Great Pond in Belgrade, ME. 

While planning for the trip, I spent a fair amount of time looking online for information about the camp, which I had never been to. Unfortunately, there isn't much information about Camp Bomazeen on either the Pine Tree Council website or elsewhere online, so I thought I would share a bit of what I observed on our trip here.

Camp Bomazeen is on Horse Point Road in Belgrade.  It's actually situated between privately owned houses which made for an interesting experience on this trip when one of our non-scouting neighbors had a rather large late-night housewarming party.  The camp includes considerable waterfront with terrific views of Great Pond.


A view of the main waterfront at Camp Bomazeen, just out the front door of McCurdy Lodge.


Facilities


McCurdy Lodge

We stayed the weekend in McCurdy Lodge which is one of two cabins on the site equipped with wood stoves for winter camping.  I didn't count the bunks, but according to the Council's weekend rental form, this cabin sleeps 28.  It includes a large wood stove that was plenty to heat the cabin on the very cold and windy weekend we were there. The cabin also has a fireplace-wood stove conversion that we didn't use.

This large woodstove is the primary hear source in McCurdy Lodge at camp Bomazeen.

You do have to supply your own firewood. There is a latrine behind the cabin with electric lights an separate facilities for males and females. The cabin is also appointed with picnic tables, electric lights and enough outlets for adults to keep their phones charged.

We enjoyed our stay in McCurdy, my only cautions for groups staying here are:
  • There is no outside fire ring and the fireplace is closed up, which posed some challenges for us doing Dutch Oven cooking and we had to improvise.
  • There is only one room, which can be problematic if you're trying to adhere to the Guide to Safe Scouting's requirements for separate sleeping accommodations for males and females.

McCurdy Lodge from the North. The latrine is on the far left of the photo.

As I mentioned, the fireplace has been filled up with a plate-style conversion stove (below).  Given that the cabin's main stove was plenty to heat the place, I'd have preferred this left open for that open fire feel and a place to cook with the Dutch Ovens out of the wind.

One thing units should be sure to do is create a plaque commemorating their stay.  I hadn't planned on this and ended up carving one into a piece of scrap lumber. (Another leader traced my carving with a black Sharpie - see the below photo at top right). It's really fun to see these plaques scattered around the cabin and look for units and scouts that you know.


Pavilion Cabin

Pavilion is the smaller of the two winter cabins.  It sleeps 16 and features a walled-off second room to accommodate separate sleeping accommodations for females as required by Guide to Safe Scouting rules. We were originally supposed to be in this cabin but were relocated by the camp ranger because it is marginally further from the road than McCurdy and the camp roads were not in the best shape.

This unit is heated by a single wood stove and has electricity.  It's a short walk to the nearest latrine facilities.


Troops like ours that have camped quite a lot at Camp Hinds in Raymond or Camp Nutter in Acton could definitely enjoy the change of scenery at Camp Bomazeen.  I only wish that the weather had been less windy when we were there so we could have enjoyed more time out and about.  Happy camping!

Saturday, September 1, 2012

Canoeing the Headwaters of the Allagash Wilderness Waterway


Recently, I had the opportunity to take a 50+ mile canoe trek along the Allagash Wilderness Waterway with 7 Boy Scouts and two other adults.

Since no one on the trek was experienced in planning a lengthy trip such as this one, we decided to go through Maine High Adventure, a wilderness camping program for scouting groups sponsored by the Katahdin Area Council and run out of its base at Grand Lake Matagamon. The base provided most of the required equipment and food, a guide, and help planning the trip. In addition to the Allagash route we chose, the base offers several other treks including the East and West Branches of the Penobscot River, the Aroostook River, and other less traveled routes in the Maine North Woods.

Day 1 Outfitting and Shakedown


We spent our first day at the Maine High Adventure base getting outfitted, planning our trek, and refreshing our canoe skills. We then settled in for the night at one of the base’s “trailbound” campsites, and spent a little time cliff jumping in the evening.

Day 2 Chamberlain Thoroughfare


The next morning we paddled our canoes across Grand Lake Matagamon to start our journey. Upon reaching the landing we loaded our gear into the van for the 3+ hour ride to Chamberlain Thoroughfare. We saw a moose and several deer in the early part of the drive, which involved driving around Baxter State Park to Millinocket. We then used lumbering roads to head into the North Woods: First the Golden Road, and then the Telos Road. Finally, we reached the Chamberlain Ranger Station and had lunch at the landing before making the short paddle to our first campsite.  

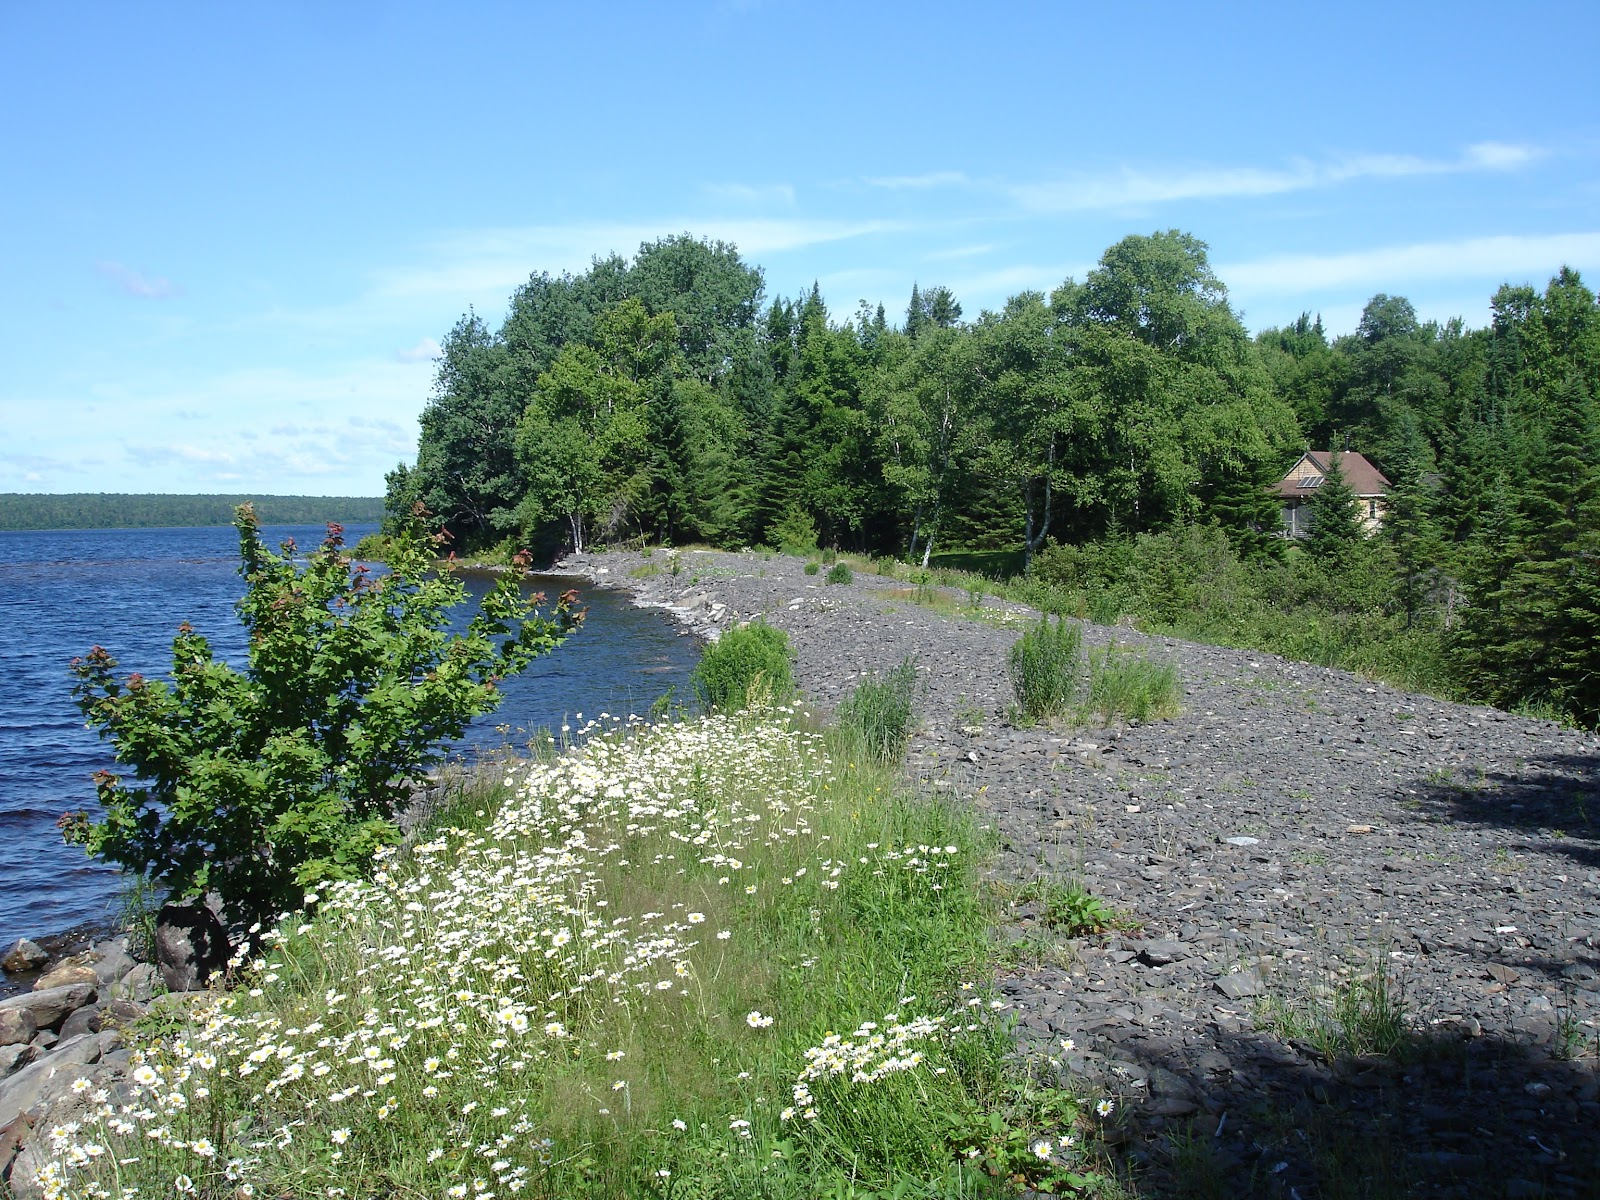
Originally we had intended to stop at the “Boy Scout” campsite on Chamberlain Thoroughfare. This site, originally constructed exclusively for scout use, is now open to the public. Interestingly, however, it was occupied and we had to relocate to “Thoroughfare” campsite, an adjustment that is apparently common on the Allagash where all sites are first-come, first-served, but it was the only such adjustment we had to make. We spent the afternoon in the water around the site, swimming and fishing.

Day 3 Chamberlain Lake


For our first full paddling day, we had planned an 8 mile paddle northwest along Chamberlain Lake. We set out early in the morning paddling up the rest of the Thoroughfare, and I paused once or twice to take photos of the great views of Katadhin and The Travelers at our backs.


Unfortunately, when we reached the main body of Chamberlain Lake we were met with a strong headwind out of the northwest with gusts of 15-20mph. This slowed our progress. We hugged the shoreline for the first four miles, stopping several times at campsites on the shore and reached Gravel Beach campsite after a few hours, for a snack break.

Upon leaving Gravel Beach, we decided to try paddling into the wind to a point a couple of miles up the lake. A few days later with better balanced crews this might have worked, but unfortunately our stronger crews found themselves stopping frequently to wait for our weaker teams, and eventually we had to turn back toward Gravel Beach, where we set up camp in hopes of better weather to come.

Day 4 Chamberlain Lake to Eagle Lake


The next day was sunnier,but high winds still hampered our progress. This time we hugged Chamberlain's western shore to stay sheltered from the wind and made good progress. We stopped at a pebble beach along the route for a break and saw moose tracks on the beach, then pressed on, easily making our prior day's goal while it was still quite early in the morning.

While we were parked along shore for a brief hydration break, the ranger stopped to chat with us, and we ended up hitching a ride with him across the lake to Lock Dam. We loaded first the packs, then the canoes onto his center console power boat, and he carried us across two canoes at a time.

It's easy to look back and say that we should have made the crossing, but the prior day's experience was fresh in our minds and we had 12 miles to cover that day. It’s important to understand your crew's limitations, and the ranger was pretty clear that he’d rather help us out this way than rescue us if we got into trouble. It's an important lesson for everyone to avoid letting your pride get in the way of a safe and successful trip. 

Lock Dam

An interesting feature of Day 4 was our brief visit to Lock Dam. This dam was originally built to reverse the flow of water from Chamberlain Lake, sending lumber south to Bangor’s mills instead of north to Canada. Later, locks were added here to lift lumber from nearby Eagle Lake, but were discontinued after a few years in favor of a mechanical tramway. Almost no sign of the locks are visible today other than the lock keeper’s cabin, which now serves as a ranger’s cabin.
The earthen "Lock Dam" was built to send lumber south.

After a short portage around the dam, we continued on to Eagle Lake for another lengthy paddle, hugging the shoreline. Due to a miscommunication, we missed our intended stop at The Tramway, but made it to Hidden Pine campsite by 5:30 PM, getting us back on schedule with our trek plan.

Hidden Pine is one of the roughest campsites we experienced on the entire trek, offering very little level ground to pitch your tent. If you find yourself in the area, I highly recommend the short additional paddle to Priestly Point, just a few hundred yards further along the trail.

Day 5 Eagle Lake to Churchill Lake


Beginning on this, our third serious paddling day, traveled smaller lakes with markedly calmer winds. The calmer water conditions afforded us more opportunities for viewing wildlife, fishing, and photography than we had experienced before. We saw several eagles in flight and fishing on this day, which were unfortunately too fast moving and too distant to capture with my compact camera. 

It's difficult to make out the fishing bald eagle above and to the right of the red canoe.

We made an early stop at Little Eagle campsite to check our maps, and found that the last camper had made quite a mess in the site, leaving beer bottles and the remnants of fireworks, which are illegal in the North Woods, all around the site.  Our scouts spent some time cleaning these up before moving on.

We also paused on the shore of Churchill Lake for an attempt at canoe sailing. This process involves using canoe poles (yes, I said poles, see a video of a Maine Guide canoe poling) and ropes, together with our dining fly, to sail four “rafted” canoes. This was the first time on the trip we’d had the wind at our backs, but unfortunately they were inconsistent and gusty, making for poor sailing, and our attempt was short-lived. 

Our brief attempt at Canoe Sailing.

We landed at The Jaws campsite quite early in the day. Unlike the prior night, this was one of the best sites we encountered, featuring three distinct campsites, all of which were level and grassy, and a broad sandy beach, where our crew enjoyed a swim and canoe swamping contest. We also had our best moose sighting (a Cow and Calf) since our van ride on day 2.

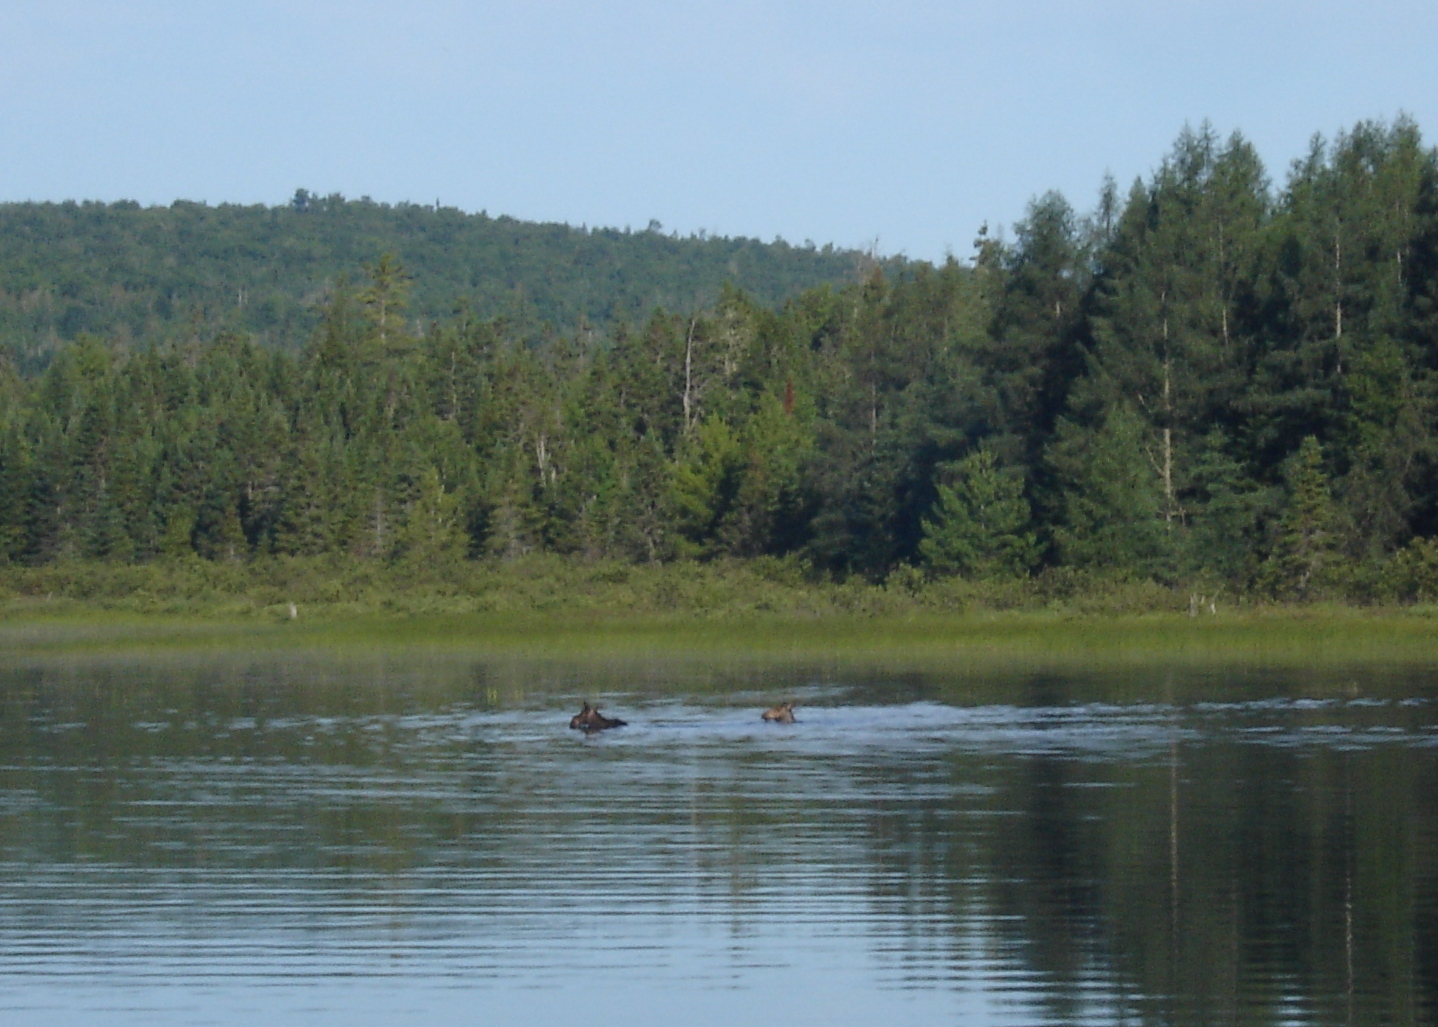
Day 6 Churchill Lake to Umsaskis Lake


We set off early the next morning for the short paddle from The Jaws to Churchill Dam in order to be at the head of the line to run the rapids on the Allagash River. The water was very calm that morning and we were fairly close to a moose and several loons in the mile or so we had to travel.

A cow moose feeding at Churchill Lake
Scout and Scouter pause to observe wildlife.

The rangers at this site offer a portage service. For $10, they haul your gear past the rapids so that you can run the whitewater without risking damage or loss of your gear. We took advantage of this service, then portaged our canoes and safety gear around the dam. We had about 45 minutes to wait after the dam had been opened for the day, and during the wait, we saw three moose, including a cow and calf swimming across the lake above the dam.

Moose above Churchill Dam.

Moose swimming above Churchill Dam.

When we got the all clear, we pushed off. This stretch of the Allagash has about a mile of class 2 whitewater, followed by another three miles of class 1 whitewater and quick water. In spite of being whitewater novices, we weathered the water without taking an unintended swim. Whitewater paddling is a lot of fun. If you've never tried it I'd encourage you to give it a go on a stretch like this with low to moderate difficulty and long enough to really get a feel for what it's all about. We then picked up our gear at the site of the washed-out Bisonette Bridge, and continued on through calmer waters into the twisty, almost swamp-like area where the Allagash feeds Umsaskis Lake.

Umsaskis itself is small and shallow compared to most of the lakes we traveled over our journey. As a result, we reached our final campsite, Sandy Point, early.  Two of this location's three camping areas are grassy and comfortable, although the third feels a bit like a gravel pit.  Fortunately, we were the first there and had our pick of sites and time for some much needed downtime before dinner. Although we didn't spot any moose at the site, we did see several jackrabbits, and signs that moose had been in the area.


Day 7 Return to Base 


On the final morning, the crew staged a short canoe race between the campsite and the bridge under the Realty Road, then put in at the ranger's station to wait for the van back to the base. This van ride followed logging roads to Ashland, and Route 11 from Ashland to Patten.

We made a short stop in Baxter State Park to cool off at some natural waterslides before getting out at the landing at Grand Lake Matagamon to paddle back to Maine High Adventure on the other side of the lake.

In all, our trek covered 53 miles including our two Matagamon crossings. Some days, we came off the trail exhausted and it seemed like we never had a chance to slow down.  Other days were calmer. I think it is those days the boys enjoyed most, because it gave them a chance to make the trip their own. 

Our full journey is shown in the map below.


Map of Our Trek


View Maine Outdoor Living Trails and Campgrounds in a larger map

View the South Branch Pond Trail Map

Saturday, August 27, 2011

Tents DO Keep You Dry in the Rain when Chosen and Pitched Well

The other day when I was watching the news, one of our local weathermen made a comment about his most recent camping experience that made me shake my head.  He said that "tents aren't waterproof," that rain flies don't help, and only a plastic tarp strung over the tent will keep you dry. 

Cabela's cabin tent.
Although I'd hesitate to call them "waterproof", a good tent will keep out the rain as they're designed to do.  After 30 years of camping, though, I can safely say that while not all tents are created equal, a good tent will keep out the rain without a tarp over the roof if it's pitched and used correctly.  Case in point, I'm currently typing on my laptop in the middle of a downpour with a stiff breeze - so far, we're high and dry. 

Like I said though, not all tents are created equal.  There are a few things I've learned to look for in a tent if you're planning to be more than a fair weather camper.  After many years of camping with the scouts and the family, we've accumulated four tents.  The best of them have a couple of key features:
1.       A good rain fly does matter -  It's what keeps the rain out and for reason's I'll discuss later, the separation between the fly and the tent is a big part of what keeps you dry.  Choose a tent with a rain fly that goes all the way to the ground if possible, or at least covers the entire roof and a significant part of the side with a generous overhangMany cheap tents have a tiny fly that covers half or less of the tent wall.  I wouldn't trust them to keep me dry. It's also important that the rain fly has as little contact with the tent walls as possible.
2.       Waterproof flooring - After the rain fly, the floor is the second most critical feature.  You can't avoid contact with it, and if it's not waterproof runoff will get you wet from below.  Some tents, like our Eureka Timberline, have a lightweight rubberized flooring material.  Others, like the Cabela's cabin tent we're in at the moment, have a poly weave floor like a tarpaulin.  Both of these styles keep out the water well.  Some lightweight backpacking tents are constructed with a nylon floor that is not waterproof like the Hillary 2 man dome I've had since I was a 14 year old boy scout.  When weight matters it's an appropriate compromise. Such a floor makes proper use of a good ground cloth all the more important, but you should be using one anyway.
3.       A tub style floor - Seams are the weakest part of your tent so you don't want them to be in contact with standing water - which could happen on the ground.  If your waterproof floor comes up off the ground a few inches, you'll be less apt to have puddles near the walls of your tent. 
Proper set up and use of your tent also make a big difference.  My wife and sons set this one up because we knew the storm was coming and I was still at work.  They've obviously done a great job. 
Here are some simple steps that can help you stay dry:
1.       Choose a good spot - This should be obvious, but don't choose the low spot in the site to pitch your tent or you'll be in a puddle.  Find a location that is pitched slightly so that water runs off.  You should also make sure the site is clear of sticks and rocks that might damage your tent.
2.       Follow the directions - Your tent is designed to be pitched a certain way.  Doing it wrong will not only make it leak, but could permanently damage it so it can't be used again.  Sometimes the directions are a little cryptic, but if you are patient you'll figure them out.  Take your time and do it right.
3.       Use a ground cloth - This one is very important.  For tents with a good waterproof floor, the ground cloth protects your investment from sticks, rocks and other debris on the ground.  Holes are not a good thing.  Also if you have a nylon floor, it's your only waterproof protection.  Tarps are great if you are carrying your gear in a car and have space.  If you're backpacking, a sheet of 6 mil poly does the trick and weighs less.
4.       Fold your ground cover to fit your tent - Ideally, your ground sheet will be 6-10 inches larger than the tent floor so you can fold 3-5" of it under itself to match your tent floor.  This encourages water to run under the fold and under your ground cloth rather than under your tent - very important with a nylon floor.  Don't leave your ground cover extending out beyond tent walls.  If it does, water can accumulate on top of it - and run between the ground cloth and the floor.
5.       They give you those ropes and stakes for a reason - I see a lot of tents pitched without them, and have been guilty of not using them myself in fair weather.  In foul weather, your tent lines keep surfaces tight and enable water to run off more effectively.  They also provide support to the structure  in winds, and provide separation between the rain fly and the tent - all important stuff.
6.       Don't touch the walls during wet weather - To some degree, my weatherman was right.  The tent walls aren't quite waterproof, but rather are built to shed water.  If you touch a wet wall, you'll get damp.  A good rain fly helps by creating a couple of inches of space between the wet outside fly and the dry wall you see, but only if the tent is pitched so the rain fly doesn't touch the inside wall, and only where your rain fly covers your tent walls.
7.       Make sure it's vented - it may be counter-intuitive, but even in the dead of winter you should leave tent windows open slightly.  Nylon doesn't breathe much and if the moist air from your breath is trapped in there, it will condense and make everything wet - leak or no leak.
It's morning now. I'm outside the tent enjoying a beautiful view of a calm lake with blue skies overhead.  It's a view I'd have missed if we hadn't spent the night here last night.   My coffee's about done and it's time to switch from my laptop to that very good book I brought out of the tent with me before the rest of the family gets up. 
I'll leave you with two other important thoughts:  Don't wash your tent.  It has coatings on it to make it weather resistant that will come off in the laundry.  Also, make sure you remove your tent from its bag and dry it thoroughly when you get home, then put it away neatly rolled or folded.  It will keep away mildew, reduce the temptation or need to wash it, and preserve the fabric for many years to come.
Being a little superstitious, I'm actually a bit relieved that writing this post somehow didn't cause a leak, but I have shared a few of my thoughts on how to select and pitch a tent with a tarp not overhead but underneath so that you'll stay dry when camping.  I hope it's helpful!

Thursday, August 4, 2011

Family Camping at Papoose Pond Resort and Campground

Most people associate Maine with its coastline, which is very beautiful but very busy in the summer months.  By far, our favorite region of Maine for camping is the Western Maine mountains and lakes.  There is less traffic and less hustle and bustle, and for me, that makes for a more relaxing vacation.  There are a large number of campgrounds within an hour and a half or so of our home on some very beautiful lakes, with plenty of nearby mountains for easy to moderate hikes that are perfect for the family.
 
Last week, we went camping with some friends at Papoose Pond Resort and Campground in the Town of Waterford.  Except for a pair of overnight rainstorms, the weather was very pleasant and it was a good week for camping.  This was our first time at this campground, which offers many amenities and seems to be structured to cater to the camper who is staying for a week or two.  We didn't see evidence of the semi-permanent seasonal campers there that are so common in many Maine campgrounds.

Sites and Site Amenities

Papoose Pond offers a wide variety of site configurations to meet the needs of the traveler.  As you'd expect, these include your typical primitive tent sites with fire pit, picnic table, and community water, and trailer sites with three way hookups, picnic table, and fireplace.  Also like many competing campgrounds, Papoose offers rental cabins, but there were more available here than at many other campgrounds I've been to.  If you prefer cabin camping to setting up a tent, this is worthy of checking out.

The picnic shelter in a Kit-N-Bath site.
What was really interesting, though, was the sites in between the "basic" site and the cabin.  On the urging of our friends, we tried out one of Papoose Pond's Kit-n-Bath sites.  These sites have a wooden picnic shelter that is open on three sides (see photo).  One end of this open area is enclosed with open shelves to stash your cooking gear and a counter with a sink, electric cook-top, and outlets.  In behind was a full bathroom with shower, toilet and sink.   For someone who's tenting like we were, this was a pretty remarkable convenience.    As an outdoor cooking enthusiast, I would have been happy using my Coleman Propane stove instead of the cooktop, but the sink with hot and cold running water was awesome for cleanup.  Papoose offers a number of variations on this theme, including sites with covered shelters without power and water, kitchen and bath without a covered picnic table, and even a site with a tree house and a picnic shelter.

Programming and Activities

Papoose Pond has more structured activities and events than we are used to seeing at the campgrounds we frequent.  There were planned sporting events, crafts, and social activities every hour during the day, and movies, concerts, and social events in the evening.  We tend to like to move at our own pace when camping so we didn't partake of many of these events.  We did attend Sunday evening's Rick Charette concert and take advantage of the make your own ice cream sundae special, and our oldest son attended one of two teen dances held that week.  Other than that, the two events we were most interested in, the Pulpit Rock Hike and the Crooked River Canoe Trip left at 9:00 AM - which was earlier than we were ready to hit the road after breakfast each day.  Overall, though, they seemed to offer a wide variety of activities, with something for everyone.

Other Campground Amenities

The campground features a swimming pool and a considerable sandy beach area on the pond with swimming and a fair number of rental canoes, kayaks, and paddle boats.  The pond was small though, so we chose not to use the boats, and instead put our power boat in at the public landing at nearby lake Pennesseewassee in Norway for an afternoon of tubing.  Fishing was somewhat restricted to the "Fishing Lagoon," so fishing, again was done off-site for us.  In addition to the usual camp store there is cafe for fast food favorites and a snack bar near the pool and rec hall. There were a couple of playgrounds for the kids, which seemed a bit small and under-equipped for the size of the campground.  Our youngest enjoyed a couple of games of mini-golf with friends however, and the volleyball court, baseball diamond, and other sporting facilities were frequently busy.  Lastly, on a more mundane level the bath houses, to the extent we had to use them, were clean and well supplied.

Overall we enjoyed our stay at Papoose Pond.  The site amenities were a nice change of pace that made for a relaxing stay and our kids enjoyed the beach.  If you plan to go - I suggest bringing a bicylce.  The campground is quite large and  getting around can be tedious on foot.  Happy camping!

Cheesy Potatoes with Sausage and Roasted Red Peppers

Sometimes you try a recipe that you can tell has great potential, but something is missing.  That happened to me with a recipe from Cast Iro...