Saturday, October 4, 2014

Dutch Oven Mountain Man Breakfast

The mountain man breakfast is one of those classic Dutch Oven recipes that most camp cooking enthusiasts make at one point or another.  We make this pretty often on Boy Scout camping trips, and even some scouts and adults who usually don't care for vegetables will eat every bite of it.  We like to serve this with biscuits that we cook in foil over the fire. 


Ingredients

  • 1 lb bulk mild pork sausage (no casings)
  • 1 tsp chopped garlic
  • 1 med onion, chopped
  • 1 red bell pepper, chopped
  • 1 green bell pepper, chopped
  • 2lbs frozen shredded hash brown potatoes
  • 12 eggs
  • 2 Tbsp water
  • 1/2 tsp salt
  • 1/4 tsp pepper
  • 12 oz shredded cheddar cheese


Equipment

  • #12 deep dish Dutch oven (8 quart)
  • lid lifter
  • large metal spoon
  • bowl and wisk for beating eggs 
  • knife and cutting board 
  • Charcoal (30 briquettes)

Directions

Start at least 30 charcoal briquettes.

While waiting for the briquettes to heat up, I usually start cooking on the camp stove to save time.  Place your Dutch oven on the camp stove over medium flame and brown your sausage.  Then, add onions, peppers and garlic and saute until the veggies are tender.

Add shredded potatoes.  Turn with your spoon a few times until the ingredients are well mixed.  Wisk together eggs, water, salt and pepper in a bowl and pour into the Dutch oven with the other ingredients.

At this point, transfer your Dutch oven to the fire. On a warm, calm day use 10 briquettes below and 14 on the lid, reserving the rest.  Where there is a breeze or the weather is cooler, increase the number of coals.  Cook until the eggs are firm - about 15 min. checking with a fork.  At this point your casserole looks like this:

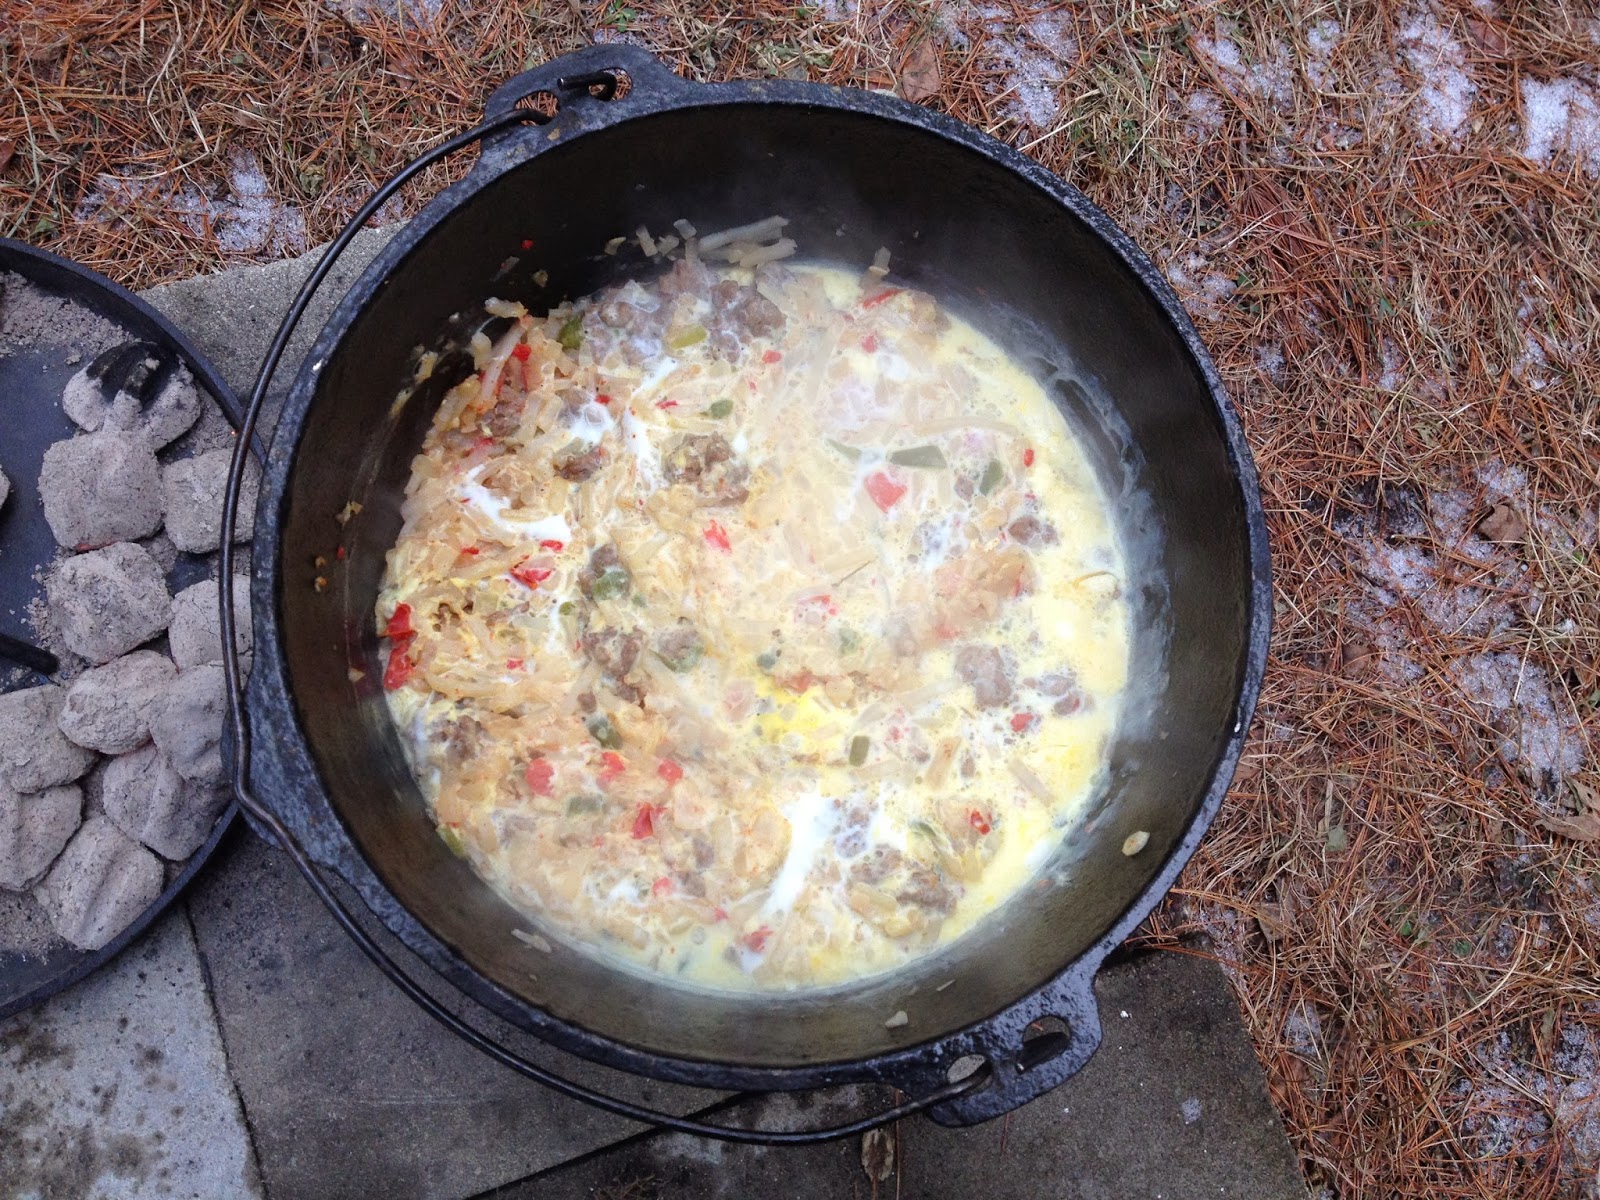
A Dutch Oven Mountain Man Breakfast casserole before cheese is added.
   
Next, sprinkle shredded cheddar over the top of your casserole, cover and return to the fire, cooking until the cheese is melted.  Your finished casserole will look like the photo below. Remove from the heat and serve hot - delicious!

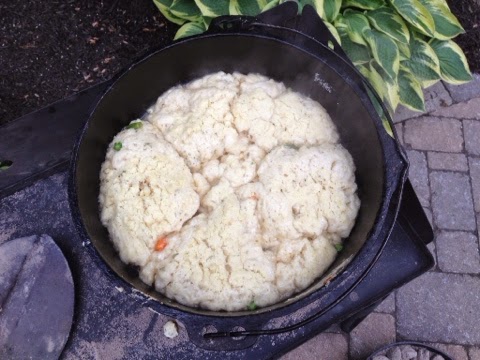
The finished Mountain Man Breakfast.

Cooking Biscuits

Normally, I serve this meal with hot biscuits.  I've done this a couple of ways, including Bisquick or Jiffy baking mix prepared to package directions or a large ready-to-cook biscuit like Pillsbury Grands.

Arrange your biscuits on a sheet of aluminum foil.  Place another sheet on top of the biscuits and roll the edges to form an envelope.  I recommend double-layering the foil to prevent rips and tears.  Place your foil package on the Dutch oven lid, coals or even a hot wood stove.  Cook 10 mins or so, turning frequently.


Saturday, August 30, 2014

Dutch Oven French Toast with Pecans

I knew it was time to share this Dutch Oven French Toast recipe when my oldest son, who is not a breakfast eater, listed it as one of only two breakfast meals that brings him back for seconds. It makes a delicious "no syrup required" French toast with a pecan praline "topping".

This Dutch oven French toast recipe bakes with a brown sugar and pecan topping underneath.  I usually flip this to the top when serving.

Ingredients
  • 1/2 cup butter
  • 1 cup light brown sugar
  • 1 cup chopped pecans
  • About 2/3 of a Baguette (French Bread)
  • 8 eggs
  • 1 1/2 cups milk
  • 1 tsp vanilla extract
  • 2 tsp cinnamon
Cooking Equipment
  • #12 Dutch oven.
  • Liner paper
  • Knife, bowl, wisk and a spatula to serve
  • Lid lifter, shovel, briquettes

Directions

Before you begin, slice your baguette into 1" slices.  This can be done in advance to save time in the morning.

Another time saver I find helpful is to start this meal on the propane camp stove while my briquettes are heating.  Light at least 30 charcoal briquettes, then place liner paper in your Dutch oven and move it to the camp stove.  Melt the butter, then add brown sugar and pecans and stir thoroughly.  Remove from heat.  Here's what your oven looks like at this stage:


Wisk together the eggs, milk, vanilla and cinnamon in a bowl.  Dip the bread into the egg mixture and flip it over, so that it is saturated with the mixture, and arrange the slices on top of your brown sugar and pecan mixture, packing them in tight until the entire bottom of the oven is covered, like this:

Dutch oven French toast before cooking.


Pour the remaining egg mixture into the Dutch oven and cover.  Arrange 10-12 briquettes below the oven and 14-16 above and bake until golden brown - about 30 minutes.

Top briquettes should be arranged around the perimeter of the oven initially to reduce the risk of over-browning. I recommend checking at 20 minutes to make sure things are going well, and possibly spreading briquettes over the whole lid at that time. 

To serve, remove the liner paper from the oven and break off 2-4 slice servings with a spatula, flipping them over onto the plate.

Serves 8.  For a larger crowd, you can double this recipe in a #14 oven, although you may need to double stack your bread slices. 

Sunday, June 22, 2014

Dutch Oven Dumplings with Easy Chicken Stew

You know a recipe is a winner when the kids ask for it. When my oldest son requested this the other day and his very picky younger brother ate every last bit of a large bowl (even the Lima beans), I figured it was time to share this one.

This Dutch oven recipe makes a yummy if simple chicken stew with lots of dumplings on top and will feed 6.


Ingredients


Stew
  • 3 large boneless skinless chicken breasts
  • 1 lb mixed frozen vegetables
  • 2 quarts chicken broth, or 8 bullion cubes and 2 quarts water
  • 2 tsp chopped garlic
  • 1 medium onion, chopped
  • 2 bay leaves
  • 2 sprigs of fresh rosemary
  • 3-4 sprigs fresh thyme
  • 2 tbsp olive oil
  • 1/2 tsp salt
  • 1/4 tsp black pepper
  • 2 tbsp cornstarch
  • 1/4 cup cold water
Dumplings
  • 3 1/3 cups all-purpose baking mix
  • 1 1/3 cup milk
  • 2 tbsp melted butter, cooled
  • 2 tbsp dried parsley flakes

Start your briquettes.  While they are heating, mix dumplings according to package directions, add parsley, and set aside.  Then, cube your chicken breasts.

Making Your Easy Chicken Stew


Arrange 10-12 briquettes under a #12 deep dish Dutch oven. In the bottom of your Dutch oven, sauté onions and garlic until the onions are tender.  Add chicken and brown thoroughly. 

Add chicken broth, bay leaves, rosemary, thyme, salt and pepper and bring to a boil, stirring occasionally.  While the broth is heating, mix cornstarch and cold water in a cup or small dish.  Add cornstarch mixture and frozen vegetables. 

Put the lid on the Dutch oven with 14 briquettes on top and bring the stew to a brisk, bubbly boil.  At this point, a little extra heat below the oven may also be helpful to speed up the cooking process.

Adding your Dutch Oven Dumplings


Once your stew is bubbling vigorously, it's time to spoon your dumplings on top of the stew. 

Remove the lid from the Dutch oven and using a pair of serving spoons add dumplings.  Use one spoon to scoop a generous amount of batter, then hold the spoon close to the surface of the stew and use the other to scrape the batter onto the stew, floating the spoonful of batter on the surface. Repeat until you've used all the batter.  It's OK if there are gaps between dumplings.  These will fill in as they cook.

Cover the oven and move your top briquettes to the outer edge of the lid and bake 10-15 minutes, checking periodically to be sure the dumplings don't burn.  Dumplings can be checked with a fork for doneness.


Saturday, April 19, 2014

Dutch Oven Roast Chicken and Foil Baked Veggies

It's true that necessity is the mother of invention.  I cooked my first full roast chicken in a Dutch Oven a few years back when a friend and organic food enthusiast brought an 8+ pound grass fed roaster on her first ever RV camping trip next door to our seasonal campsite.  Lo and behold, the chicken wouldn't fit in her travel trailer's tiny oven, and it was up to me to get the bird cooked.

Fortunately, my maiden effort was successful, and I've added a few improvements in the years since.  The recipe and photos below are for the dinner I helped Troop 817 scouts prepare when we were cabin camping at Camp Bomazeen last December.  We were feeding a big group and did two birds, but I've reduced the quantities here for more of a family meal.

A pair of Dutch Oven roast chickens on our recent trip to Camp Bomazeen.

Although Dutch Ovens are known for one-pot meals, we cooked the veggies in foil on top of the oven. This approach shortens the time it takes to cook the bird, much like an un-stuffed turkey cooks faster than a stuffed bird.  It also reduces the liquid you need in the pot, so you bake rather than steam, giving you a browner skin.

Ingredients:


Chicken
  • 7-8 lb roasting chicken
  • 1     tsp garlic powder
  • 1/2  tsp salt
  • 1/2  tsp ground sage
  • 1/2  tsp ground thyme
  • 1/4  tsp pepper
  • 2     large onions

Veggies
  • 6 medium potatoes
  • 2 cups carrots, peeled and cut
  • 1 medium onion
  • cooking spray
  • EVOO, or butter or margarine
  • salt and pepper

Cooking Equipment: 

  • #12 or #14 deep dish Dutch Oven
  • lid lifter
  • shovel
  • aluminum foil
  • knives, peelers, mits
  • (optional) Dutch Oven liner paper
  • paper towels

Starting Your Dutch Oven Roast Chicken


Combine the dry seasonings.  For camping trips, I do this beforehand in a snack-size ziploc bag. Remove neck, etc from an 7-8 Lb roasting chicken.  Rinse and pat dry with paper towels, then sprinkle the bird inside and out with the seasoning mixture.

Line the Dutch Oven with liner paper for faster clean-up if desired. Cut 2 large onions into thick slices (rings) and use these to line the bottom of the Dutch Oven.  They'll add some flavor and moisture and help prevent the bird from sticking to your oven.

Ideally, you want the temp inside the oven to be between 375 and 400. On the windy winter day that we cooked our chickens, that took a lot of charcoal. In the summer, start with the lid diameter plus 2 on bottom and the lid diameter plus 6 on top and see how it goes.  Add more if necessary.  Bake for 60-90 minutes, until the bird is fully cooked and juices run clear.

We had to get really creative when cooking in the strong winter winds at
Camp Bomazeen, using discarded tent platforms for a windbreak, and
borrowing a few blocks from a fireplace to make a cooking platform.

Cooking Your Veggies


There is ample time after the bird is on to prep your veggies.  Spray a generous sheet of aluminum foil with cooking spray, then peel and cut your potatoes and carrots into bite-sized portions (the smaller they are, the faster they cook).  Rinse and arrange on the foil.  Chop your onion and add to the foil.  Drizzle a little EVOO or add a few pats of butter on the veggies, and sprinkle with salt and pepper.  

Spray a second sheet of aluminum foil and use it to cover the veggies, rolling the edges to form a pouch.  It's usually a good idea to add a second later of foil outside the first to prevent you from losing half your meal because of a tear.

When your chicken has been going about 45 minutes or so, set your foil pouch on top of the the coals on your Dutch Oven lid.  Cook 30-45 minutes, turning frequently.  Wisps of steam escaping the corners of your foil pouch and the smell of cooking onions are a good sign that your veggies are nearly done.

Here, the foil pouches containing our veggies are shown
atop the two Dutch Ovens we used to roast chickens.

Finished Meal


Troop 817 gobbled this meal up after a long day of winter camping, so it was definitely a hit. Boys were even seen picking the bones clean after dinner.  We also cooked a Dutch Oven apple crisp for dessert, but that's a story for another day's post.

A fellow camper carves the chicken before we served up our meal,
which was a big hit with the boys.

Wednesday, February 5, 2014

Dutch Oven Chili with Cornbread

Chili is one of those meals that evokes memories of when I camped as a Boy Scout back in the mid-eighties.  Ironically, though, it's not a meal I cook often camping anymore.  It seems like most of the Scouts in my son's Boy Scout troop don't care for chili, and only two out of four members in my family enjoy it.  As a result, it isn't practical to lug all the ingredients out on a camping trip.  I decided to splurge for this past weekend's Super Bowl, however, and made a batch of Dutch Oven chili with cornbread.

Like most chili recipes out there, this one is my own concoction, but some of the elements, like cooking cornbread on top of the chili, were picked up from a fellow Scout leader and Dutch Oven enthusiast. 

Cooking equipment for this recipe includes a #12 deep dish Dutch Oven, lid lifter, shovel, charcoal briquettes, mixing bowl and various measuring cups and spoons.  Optionally, you may also want to use a camp stove for the early part of the cooking process.

Ingredients:


Chili:
  • 2 large (28 oz.) cans diced tomatoes
  • 1 large (2 lbs) can dark red kidney beans, rinsed
  • 1 small (1 lb.) can black beans, rinsed
  • 1 bottle chili sauce (you'll find this in the condiments section)
  • 1 lb. ground beef
  • 1 large onion, chopped
  • 1 large green pepper, diced
  • 1 cup sliced mushrooms
  • 2 tbsp chopped garlic
  • 1 tsp salt
  • 2 tbsp Olive Oil (opt.)
  • 1 Tbsp Chili Powder (Additional to taste - I use a lot.)
  • Cayenne Pepper (If you like more heat.)
 Cornbread Topping:
  • 2 boxes Jiffy brand cornbread muffin mix
  • 2 eggs
  • 2/3 cup milk


Starting Your Chili


Brown your ground beef and set aside.  This can be done quite well in the bottom of your Dutch Oven, although I usually cook it beforehand in a separate pan and carry the pre-cooked meat to the campsite.

To save on briquettes, I typically start the chili in the Dutch Oven on a gas camp stove or grill side-burner.  This may not be necessary if you're cooking on an open fire.  In the base of a #12 deep dish Dutch Oven, sauté the onions, garlic, and green pepper in the olive oil until the onions begin to soften.  Add mushrooms and sauté a few minutes longer.

Add tomatoes, chili sauce, kidney beans, black beans, salt, and chili pepper.  Cook, stirring occasionally, until bubbly.  Here's what it looks like at this point:


Simmer for at least 45 minutes - longer if you'd like a less chunky tomato base.  Add cayenne pepper or additional chili powder for your desired heat.

Adding the Cornbread and Finishing the Cooking Process


If you started your chili on the camp stove, be sure to light your briquettes about 45 minutes before dinner should be ready.

While the chili is simmering.  Mix the cornbread muffin mix, eggs, and milk in a large mixing bowl. Set aside until you're almost ready for dinner.
 
Transfer your Dutch Oven to your briquettes, if appropriate.  On a warm summer day, I'd use a dozen briquettes below and 12 above. I used quite a bit more on this winter day in the thirties. Your top briquettes should be arranged in a ring around the perimeter of the lid.

Bring the chili to a brisk boil, like the photo below.

For your cornbread to cook properly, the chili must come to a brisk boil.

Once the chili is boiling, use a large spoon to spoon the cornbread batter on top of the chili.  Cover and cook, about 15 minutes or until the cornbread cooks through.  The end result looks like this:

Completed Dutch Oven Chili with Cornbread on top - delicious!

Let the chili stand a few minutes, then serve.  You'll find that this recipe is less sour than most due to the sugars in the muffin mix.   Enjoy!


Cheesy Potatoes with Sausage and Roasted Red Peppers

Sometimes you try a recipe that you can tell has great potential, but something is missing.  That happened to me with a recipe from Cast Iro...