Friday, November 11, 2011

Rosemary Garlic Roast Chicken

This is one of the first meals I learned to cook in a Dutch oven, and is still one of my favorites.  Like many Dutch oven meals, this one is a complete meal in one pot - and it's easy.  I got this recipe from a fellow scout leader and his wife, who made it for us several years ago.  It's been a perennial favorite of ours ever since.

Ingredients are as follows:

4 split chicken breast halves, skin on
1 stick butter, softened
2 tsp chopped garlic
5 sprigs fresh rosemary
2 sprigs fresh thyme
2 med onions, peeled and quartered
5 lg potatoes, skin on, washed and quartered
5 lg carrots, peeled and cut into 2' chunks
Salt and Pepper

Start the briquettes.  While they are heating, place potatoes, carrots, and onions in the bottom of a #14 deep dish Dutch oven and sprinkle with salt and pepper.  Set aside.

In a bowl, combine butter and garlic.  Strip the leaves off two of the sprigs of rosemary and the thyme and mix into the butter garlic mixture.  Rub the mixture on the chicken breasts, especially between the skin and the meat. Place the chicken on top of the vegetable.  Garnish with remaining three rosemary branches.  Cover and bake at 400 degrees for about 45 minutes or until carrots are tender, skins are browned and juice from chicken runs clear.

There will be quite a bit of liquid in the bottom of your oven when the meal is cooked, so you can err on the side of adding more briquettes than you normally would without running the risk of burning anything.  There is no need to add any extra liquid.


Sunday, October 23, 2011

An Appalachian Trail Day Hike to Piazza Rock

The highlight of our weekend in the Sugarloaf and Rangeley Lakes region was our afternoon day hike on the Appalachian Trail. There are a number of day hikes available as the AT passes through the area; we chose Piazza Rock.  Piazza Rock is an unusual overhanging horizontal boulder that's part of a glacial deposit of granite deposited on the slope of Saddleback Mountain.  The hike in is approximately 1.8 miles of fairly easy terrain, although it naturally gets quite a bit more vertical - and challenging - for the last quarter mile.

Trailhead

You'll want to park your car at the Maine Appalachian Trail Club's parking lot on Route 4, which 4-5 miles south of Rangeley on the right hand side.  Cross Route 4 and head east on the trail.  For the most part, you'll be following the main AT trail - a white blaze with a dark colored box around it, only branching off in the last quarter mile on the side trail for Piazza Rock, marked with a blue blaze.

You're greeted almost immediately with the first (and biggest) of several water crossings on the trail.  The water here rushes through a channel that appears to have been the site of an old mill wheel.

Appalachian Trail river crossing near Route 4.

Following the Trail

After crossing the river there is quite a steep incline with log stairs which were washed out when we were there.   This made for a fairly difficult start, but after this initial rough spot the trail ascends more gradually through the forest.  It's shady, and quite a comfortable hike which was welcome on the unusually warm Columbus Weekend that we were there.  For the most part, it's an easy walk.  There are, however, a number of minor brooks crossing the trail and some rather long muddy, swampy areas which the trail crosses with log bridges.


Log bridges keep your feet dry on the AT.
For the most part, we found that these were in good repair, and we were thankful for this work by the Maine Appalacian Trail Club.  These areas do seem to go on forever at times, though, and they stop and re-start a couple of times.  The brooks, in most cases, had to be crossed by picking your way across on stones - in some cases this made for some amusing family moments.

The trail crosses a dirt road at a point between two of these log - bridged areas, so it's possible to shorten your hike in if you're more interested in the geological formation itself than the hike.  We didn't research this so I don't know the name of the road.

Appalachian Trail Stop-Over

The trail to Piazza Rock splits off from AT about a mile and a half in.  You can go in several directions at this point, including Piazza Rock, the peak of Saddleback Mountain and more.  One feature of this trail junction that is worthy of a pause to mention is the Piazza Rock campsite - another project maintained by the M.A.T.C.  The site features a number of tent platforms that groups can use when hiking along the AT, as well as a lean-to for use by through hikers and most importantly for the day hiker, a clean toilet facility.  The site is a few hundred feet past where the Piazza Rock trail splits off, but it's worth pausing to check out, even if you're not in need of its facilities.  I'd especially recommend visiting the lean-to and browsing through the site log, where day hikers and through hikers alike have written about their visits to the site.  Please be sure to leave the log where you found it, and the site as you found it!

The Piazza Rock campsite lean-to.

Piazza Rock


The final hike in to Piazza Rock gets steeper almost immediately after the side trail breaks off from the AT, but it's a short climb.  Yet another brook babbles along the side of the trail here.  I indulged in a brief movie of it on my phone:


Piazza Rock itself is something to see.  It's a giant slab of granite cantilevered horizontally out from the mountainside.   There are even a number of small trees growing on top of it.  It's possible to get on top of the stone, but we didn't try for safety reasons with our kids.

Piazza Rock
Like many similar deposits of granite boulders, the area around Piazza Rock features a number of crevices that kids can climb through and explore.  My boys had quite a bit of fun in them.  Remember though that there are a lot of steep places where you can fall, and keep a close eye on children as they explore.


We had to climb through this crevice to access the top of Piazza Rock.

The boys didn't want to leave, but we hiked back out in the same direction from which we had come.  I definitely recommend this hike for families visiting the Rangeley area.

YBPF9TPBYEZ2

Saturday, October 22, 2011

A Fall Weekend in the Rangely Lakes Area

Over Columbus Day weekend, our family made a visit to the Sugarloaf/Rangely Lakes region of Maine.  We stayed for the weekend at my father-in-law's hunting camp, a short distance from Sugarloaf mountain and made a couple of day excursions to enjoy the foliage season and hike the Appalacian Trail. 

Dad's camp was a true old fashioned Maine hunting camp: a one-room cabin with gas lights, range and fridge plus a woodstove for heat. More spacious and comfortable than a tent, but still roughing it without the benefits of electicity or running water.  It served as an excellent home base for our weekend travels, which extended from Sugarloaf Mountain on Route 27 to Saddleback Mountain on Route 4, about 44 miles away.  Much of the weekend was about sightseeing and enjoying the foliage, but we did get in a really nice day hike on the Appalachian Trail to Piazza Rock that will be the subject of my next post.  For now, I'd just like to share a few photos we took over the weekend.  The area is really beautiful, and offers some great opportunities for skiing, hiking, fishing and camping.


Sugarloaf

We arrived late in the day on Saturday, but set out to explore Sugarloaf Mountain anyway. As it turned out, Columbus Day Weekend is the ski resort's "Homecoming Weekend" when Sugarloafers come back to buy their season passes for the upcoming ski season.  This meant that the mountain was very busy, and it took some time to find parking, but it also gave us the opportunity to enjoy a free ride on the Quad.  It was a great way to enjoy the mountian views in the late afternoon, when we didn't have time for a hike.


Looking east from the Quad lift at Sugarloaf.


Flagstaff Lake

The next morning we started out on a drive to the Appalachian Trail parking lot on Route 4, where we had a day hike planned to Piazza Rock.  We made a few stops along the way to enjoy the scenery and take a few pictures including this one from the western end of Flagstaff Lake.


Rangely Lake

Our next stop was in the town of Rangely, where we stopped for a few minutes in the public park by the boat launch.  The park features some great views of Rangely and the lake and has a well maintained boat launch which we're planning to come back to next summer.  Signs on the bulletin board near the launch indicate that the lake is overstocked with Landlocked Salmon, and I'm looking forward to landing a few next year.


Our next stop was a scenic overlook on Route 4 with a great view of the lake.  I spliced together a couple of shots below to try and capture the panoramic view from this spot:


Panorama of Rangeley Lake from the Scenic Overlook on Route 4


We pressed on about 4 miles from here to the Appalacian Trail parking lot on Route 4 where we stopped briefly for lunch before making the 3.6 mile round trip day hike to Piazza Rock.

Friday, October 7, 2011

Buck's Ledge and Lapham Ledge: Two Family Friendly Hikes in the Western Maine Mountains

We camp frequently at Littlefield Beaches Campground in Greenwood, Maine.  In fact, we camped seasonally there for seven summers before selling our trailer last year and going back to tenting.  We fell in love with a pair of short hikes near Littlefield Beaches a couple of years ago, and I wanted to share them with you today:  Lapham Ledge and Buck's Ledge.  Each has beautiful scenic views of the surrounding lakes and countryside and at 1.1 and 1.2 miles one way respectively they are very manageable for a family with children in a morning or afternoon.

The trailhead can be found on Route 26 across the street from its intersection with Mills Road. 


For the first half of either hike, you'll be traveling on a logging road reaching an intersection with a snowmobile trail after  about 0.6 miles.  This tends to be the sunniest, hottest part of the hike in the summer, but in other respects it's an easy walk.

Lapham Ledge

A right turn onto the snowmobile trail brings you up a gradual incline at first through a shady and well groomed trail.  The trail naturally gets steeper near the top.  When you reach the three overlapping ledges at the top of the trail you'll be treated to some georgeous views of Lake Christopher, Bryant Pond village, and the surrounding countryside.

View of Lake Christopher from Lapham Ledge

Buck's Ledge

The trail to Buck's ledge is another couple of hundred feet along the logging road on the left.  The trail here is narrower, more winding, and steeper.  I prefer this hike in spite of its larger challenge due to the exceptional views it offers of North, South, and Round Ponds, the Mt. Abram Ski Area, and the surrounding countryside.
 
View of South Pond (Left) and North Pond (Right) from atop Buck's Ledge
Mt. Abram and Round Pond can be seen in the background.
North Pond from Buck's Ledge

You can pretty easily do both of these hikes in one day if you like.  As beautiful as they are, we almost never run into anyone else on the trails or at the summit.  It makes for a nice quiet outdoor experience, right off a main road.  Enjoy your hike!

If you're planning to go, download a printable Lapham Ledge and Bucks Ledge Trail Map.

Tuesday, September 20, 2011

One of My Favorite Webelos Den Meetings

Not surprisingly, my favorite Webelos activity pin to teach is Outdoorsman.  I try to work on this one in warm weather meetings, and have now done it once in May/June and now, this year, in September. 


Outdoorsman Activity Pin
Although Outdoorsman is all about camping and camping skills, it is possible to complete the pin without actually camping out.  Even though several of the boys in our den attend camping trips, I try to make a point of completing the pin in the context of weekly meetings for those who don't.  It takes three or four meetings to do the Outdoorsman right.

One of those meetings is a double-length meeting we hold in the back yard.  Each boy makes their own tin foil dinner, and we cook them on charcoal briquettes in our back yard fire pit.  In order to expose the boys to some other interesting outdoor cooking methods, I also prepare something in the Dutch oven (Rolls This Year) and in a Cardboard Box Reflector Oven (Brownies this year.)  We make the Cardboard box oven at an earlier meeting, which is a fun activity. Parents and other family members come and cook their own meals as well. When I did this for my oldest, we also used hobo stoves, but I skipped that this year because honestly they are a bit tippy and dangerous.

While dinner is cooking, the boys worked with their den chief to pitch a tent using the required taut line hitch and two half hitches knots, and planned a skit to perform at a campfire.   I quickly set a log cabin fire lay, and we sat down to eat.  I'm happy to say everything came out very well and most everyone enjoyed their meal.   You could certainly tell who preferred not to have their meat and veggies touch each other, though!

When dinner is done, we have a few minutes by the campfire to watch the boys skit which, being boy devised and led with only a few minutes planning, turned out to be one of the more chaotic moments of the evening.  I wound up the meeting by talking about what we had done and learned by the fire with the boys, while signing off on three requirements we've completed that night in their books.

All this takes about two hours.  More than our usual meetings, but the time goes by pretty quickly and everyone enjoys themselves.  Me included.

Sunday, September 18, 2011

Dutch Oven Rolls Are Easy and Amaze Other Campers

Everyone loves fresh baked bread, and no one expects to have it hot out of the oven while camping. As a result, these are always a big hit.  As long as you have a little time, these large, light, fluffy rolls are easily produced on a warm summer day.  Like our Dutch oven pizza, we make this one with ready-made dough, so there's no mixing bowls, spoons or measured ingredients involved.

Line a #12 deep dish Dutch oven with liner paper (or greased aluminum foil if you don't have liner paper), and cut two (thawed) loaves of frozen bread dough into 16 equally sized rolls.  Arrange these at the bottom of the oven, cover lightly with a clean towel or paper towel, put the lid on your oven and place them in the sun for a couple of hours to rise.  They should rise to about 1/2 to 2/3 of the depth of the oven.  This step does require warm weather, so don't try these on a cloudy cold day, when the rolls won't rise well.
When you're ready to bake, remove the towel covering the rolls and replace the lid.  Spread 10 briquettes evenly below the oven and place 14 around the perimeter on top.  Bake for about 25 minutes, checking periodically to make sure you are not burning them.  You may need to add additional top heat near the end to brown the rolls.  Just make sure to arrange around the outside edge to avoid burning them.
The resulting rolls will fill the oven to the top and be very light and fluffy.  Serve with butter, olive oil, or just as they are.  Enjoy!

Sunday, September 4, 2011

Dutch Oven Pizza

Usually when cooking in a Dutch oven, we're cooking in a campsite where too much mixing of ingredients is impractical.  As a result, for many meals we tend to use mixes and pre-made components.  Pizza is one of those meals. There isn't a long list of ingredients or directions.  I felt it was worth writing a post anyway, though, because this is a great way to get the kids involved in the Dutch oven cooking process.  It also happens to be one of their favorite camping meals, and there are a few tips and tricks I've learned.

In terms of ingredients, the most crucial item is your favorite ready-made pizza dough ball.  We like to use Portland Pie Company's beer dough, which we can buy in our local grocery store, but any dough will work.  You'll also want your favorite sauces, cheeses, and toppings.  We've pictured a pepperoni pizza (the boys favorite) with Ragu pizza sauce, mozzarella, and pepperoni, but we've done gourmet combinations in the Dutch oven before, so get creative!

As you can see, we line the Dutch oven first with liner paper that you can buy in most places Dutch ovens are sold.  You can use aluminum foil as well if you don't have liner paper, but using the foil requires that you use a cooking spray or other grease on the foil that isn't needed with liner paper.  Paper also enables you to rotate the pizza in the oven to facilitate even cooking.  That doesn't work as well with foil.  The most important reason to use either is to facilitate getting the pizza out of the bottom of the oven easily and in tact so you can cut it.  It has the added benefit of virtually eliminating clean up!

We take the standard size dough ball and cut about 1/3 off when cooking in our #14 Dutch ovens.  The full ball gives you a really thick crust - thicker than we prefer.  Since we have two #14's and one pizza is not enough for a family of four, we usually cook two at once, and then cook off a third made from the excess dough while we are eating.  The third one usually gets shared with others or saved for snacks.

While your briquettes are heating:
  1. Stretch your dough by hand, place on the liner paper.
  2. Place the liner in the  oven.
  3. Let the kids add sauce, cheese and toppings.
  4. Cover and add heat.
In terms of heat, it's really important with pizza not to overheat the bottom of the oven.  I use 12 briquettes as evenly spread as possible under the #14 oven and about 18 on top.  If I need to add heat, I add briquettes to the top and keep the heat on bottom the same.  This minimizes burning of the crust.  Also, your top briquettes should be placed around the perimeter of the oven, leaving the center clear.  This type of top heat should be used for all breads and bread based recipes, because it minimizes scorching of the top of your meal.  Check your pizza after about 20 minutes.  Then check fairly regularly and often after that.  Turn the pizza a quarter turn each time you check it to help it cook evenly.

When the crust is done, remove from the oven by gripping the liner paper.  Then cut and enjoy!

Saturday, August 27, 2011

Tents DO Keep You Dry in the Rain when Chosen and Pitched Well

The other day when I was watching the news, one of our local weathermen made a comment about his most recent camping experience that made me shake my head.  He said that "tents aren't waterproof," that rain flies don't help, and only a plastic tarp strung over the tent will keep you dry. 

Cabela's cabin tent.
Although I'd hesitate to call them "waterproof", a good tent will keep out the rain as they're designed to do.  After 30 years of camping, though, I can safely say that while not all tents are created equal, a good tent will keep out the rain without a tarp over the roof if it's pitched and used correctly.  Case in point, I'm currently typing on my laptop in the middle of a downpour with a stiff breeze - so far, we're high and dry. 

Like I said though, not all tents are created equal.  There are a few things I've learned to look for in a tent if you're planning to be more than a fair weather camper.  After many years of camping with the scouts and the family, we've accumulated four tents.  The best of them have a couple of key features:
1.       A good rain fly does matter -  It's what keeps the rain out and for reason's I'll discuss later, the separation between the fly and the tent is a big part of what keeps you dry.  Choose a tent with a rain fly that goes all the way to the ground if possible, or at least covers the entire roof and a significant part of the side with a generous overhangMany cheap tents have a tiny fly that covers half or less of the tent wall.  I wouldn't trust them to keep me dry. It's also important that the rain fly has as little contact with the tent walls as possible.
2.       Waterproof flooring - After the rain fly, the floor is the second most critical feature.  You can't avoid contact with it, and if it's not waterproof runoff will get you wet from below.  Some tents, like our Eureka Timberline, have a lightweight rubberized flooring material.  Others, like the Cabela's cabin tent we're in at the moment, have a poly weave floor like a tarpaulin.  Both of these styles keep out the water well.  Some lightweight backpacking tents are constructed with a nylon floor that is not waterproof like the Hillary 2 man dome I've had since I was a 14 year old boy scout.  When weight matters it's an appropriate compromise. Such a floor makes proper use of a good ground cloth all the more important, but you should be using one anyway.
3.       A tub style floor - Seams are the weakest part of your tent so you don't want them to be in contact with standing water - which could happen on the ground.  If your waterproof floor comes up off the ground a few inches, you'll be less apt to have puddles near the walls of your tent. 
Proper set up and use of your tent also make a big difference.  My wife and sons set this one up because we knew the storm was coming and I was still at work.  They've obviously done a great job. 
Here are some simple steps that can help you stay dry:
1.       Choose a good spot - This should be obvious, but don't choose the low spot in the site to pitch your tent or you'll be in a puddle.  Find a location that is pitched slightly so that water runs off.  You should also make sure the site is clear of sticks and rocks that might damage your tent.
2.       Follow the directions - Your tent is designed to be pitched a certain way.  Doing it wrong will not only make it leak, but could permanently damage it so it can't be used again.  Sometimes the directions are a little cryptic, but if you are patient you'll figure them out.  Take your time and do it right.
3.       Use a ground cloth - This one is very important.  For tents with a good waterproof floor, the ground cloth protects your investment from sticks, rocks and other debris on the ground.  Holes are not a good thing.  Also if you have a nylon floor, it's your only waterproof protection.  Tarps are great if you are carrying your gear in a car and have space.  If you're backpacking, a sheet of 6 mil poly does the trick and weighs less.
4.       Fold your ground cover to fit your tent - Ideally, your ground sheet will be 6-10 inches larger than the tent floor so you can fold 3-5" of it under itself to match your tent floor.  This encourages water to run under the fold and under your ground cloth rather than under your tent - very important with a nylon floor.  Don't leave your ground cover extending out beyond tent walls.  If it does, water can accumulate on top of it - and run between the ground cloth and the floor.
5.       They give you those ropes and stakes for a reason - I see a lot of tents pitched without them, and have been guilty of not using them myself in fair weather.  In foul weather, your tent lines keep surfaces tight and enable water to run off more effectively.  They also provide support to the structure  in winds, and provide separation between the rain fly and the tent - all important stuff.
6.       Don't touch the walls during wet weather - To some degree, my weatherman was right.  The tent walls aren't quite waterproof, but rather are built to shed water.  If you touch a wet wall, you'll get damp.  A good rain fly helps by creating a couple of inches of space between the wet outside fly and the dry wall you see, but only if the tent is pitched so the rain fly doesn't touch the inside wall, and only where your rain fly covers your tent walls.
7.       Make sure it's vented - it may be counter-intuitive, but even in the dead of winter you should leave tent windows open slightly.  Nylon doesn't breathe much and if the moist air from your breath is trapped in there, it will condense and make everything wet - leak or no leak.
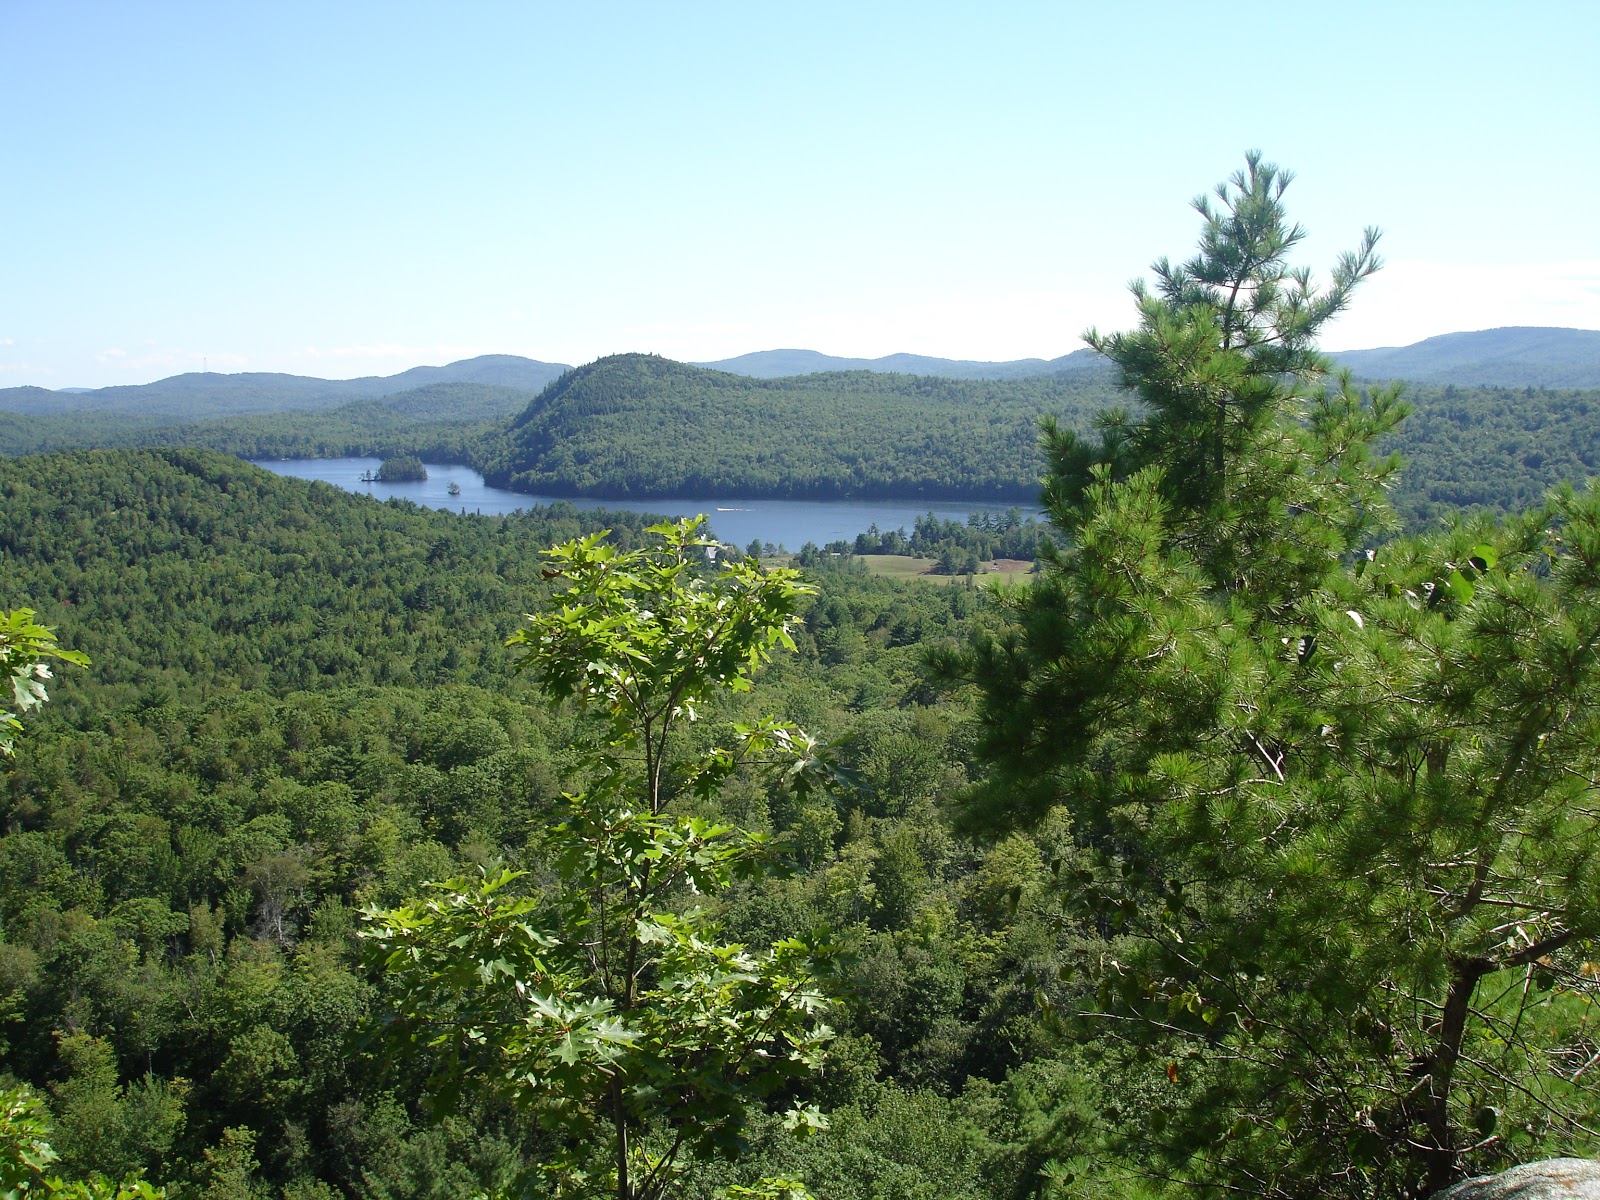
It's morning now. I'm outside the tent enjoying a beautiful view of a calm lake with blue skies overhead.  It's a view I'd have missed if we hadn't spent the night here last night.   My coffee's about done and it's time to switch from my laptop to that very good book I brought out of the tent with me before the rest of the family gets up. 
I'll leave you with two other important thoughts:  Don't wash your tent.  It has coatings on it to make it weather resistant that will come off in the laundry.  Also, make sure you remove your tent from its bag and dry it thoroughly when you get home, then put it away neatly rolled or folded.  It will keep away mildew, reduce the temptation or need to wash it, and preserve the fabric for many years to come.
Being a little superstitious, I'm actually a bit relieved that writing this post somehow didn't cause a leak, but I have shared a few of my thoughts on how to select and pitch a tent with a tarp not overhead but underneath so that you'll stay dry when camping.  I hope it's helpful!

Thursday, August 11, 2011

Chocolate Lava Cake

This is my family's absolute favorite Dutch Oven dessert.   It's a real crowd pleaser that I've made successfully for groups large and small, and it's easy to do.  Most recently, I made a double batch for the eight hungry Cub Scouts and Parents who attended Funpack Weekend.
The recipe is a simplified version of a "Hot Fudge Pudding Cake" recipe that was given to us by my mother in law. The original cooks quite nicely indoors in a 9x9 pan.  When baked, there is a chocolate cake on top and a rich, fudge like liquid on the bottom.  It's best served hot with Whipped Cream.
Ingredients:
·         1 Cup buttermilk baking mix
·         1 Cup granulated Sugar
·         3 Tablespoons plus 1/2 cup unsweetened cocoa powder
·         1/2 cup milk
·         1 2/3 Cup hot water
Start at least 30 charcoal briquettes for heat.
Combine buttermilk baking mix, 1/2 cup sugar and 3 tbsp cocoa in the bottom of a #10 Dutch Oven.  Stir in the milk until well blended.
Sprinkle evenly with remaining 1/3 cup cocoa and 1/2 cup sugar, covering the entire surface.  Gently pour hot water over the mixture.  Cover and bake at 350 for approximately 30 minutes or until a cake is formed on the top.  Remove from heat and let it cool.  Serve warm with whipped cream.
Note on Temps
Typically 350 will be the lid diameter minus 2 charcoal briquettes on the bottom and lid diameter plus 2 briquettes on the top - in this case, 8 below, 12 on top.  However, this only applies to a day in the mid 70's with calm winds.  Depending on weather conditions you will likely need to add briquettes during the cooking process based on the temps.
Other Tips and Tricks    
·         For larger groups, double the recipe in a #12 Dutch Oven, or triple it in a #14.
·         For camping, we like to mix the dry ingredients in two plastic bags before leaving home, so we have less measuring and dirty utensils in camp:  Cocoa, Baking Mix and Sugar, and Cocoa and Sugar.  We also write the liquid measures on the outside of the bags, so we don't forget.
·         It isn't necessary to grease the Dutch Oven if it is well seasoned and you clean up promptly.  However, if dessert will sit in the oven at all, pre-treating with cooking spray or light oil will make cleanup easier.

Tuesday, August 9, 2011

Funpack Weekend is a Great Way to Get Cub Scouts Outdoors

This past weekend I took my youngest to Funpack Weekend - a Cub Scout overnight program that is usually the highlight of the Summer program.  In spite of a lower than usual participation level from our own Pack, this year's program did not disappoint.  This was my seventh time attending a Funpack weekend and my fifth as leader of our pack's contingent, and I have to say that the staff ran the best program I've seen so far.
For those of you who haven't participated in a Funpack Weekend, it is a very fun event for the boys.  Our pack's contingent, along with several other packs from around the our council journey to Camp Hinds, or council's main boy scout summer camp, where we spend all day Saturday, Saturday Night, and Sunday Morning participating in a busy schedule of activities.  Saturday morning is mostly consumed with getting scheduled, the check in process, and camp orientation, but immediately after lunch the fun begins with the scheduled activities.  We spend 50 minutes each on the BB Range, Archery Range, Swimming, Craft Lodge, Nature Area and in Sports activities, with four of the activities taking place on Saturday afternoon and three on Sunday morning.  In each case, there is great emphasis on safety and responsibility while we are doing activities, especially in BB, Archery, and swimming. 
Saturday Evening begins with each pack preparing its own dinner in its campsite.  Time is a bit short for doing anything too involved, since we only have from 5 - 6:15 for prep, eating and cleanup.  Since we had a small group this year we decided to take a chance and try some Dutch Oven Cooking -  we prepared "Two Potatoes" and "Chocolate Lava Cake" - two of my favorite recipes that I'm planning to share in some upcoming posts.  We sped the process up a bit by doing most of the prep at home, and I left the afternoon's final activity, sports, early so that I could start fires and gather equipment.  Overall it went well, but we did leave for our free time activities a bit late.
Free time is next, from 6:15 to 7:15.  Nearly all of the activity areas are open for the kids to revisit during this time, but for most, it's back to BB, Archery, or Swimming.  Many also use this time to hit the trading post and spend their money on sweets, souvenirs, knives, and so on.  Saturday was quite hot and humid, so most in our Pack chose to hit the beach.  When free time is over, we have to rush back to our site to get our uniforms on for the evening's main event.
Once we have our uniforms on, we gather on the main waterfront for evening festivities.  It starts with flag retreat, which is led by older scouts, but always includes a couple of younger boys from each year.  Then we have "vespers" a "scouts own" interfaith service in which we reflect on the day's activities and  scouting's ideals and offer a prayer or two.  This year's vespers featured our campfire coordinator in Native American regalia talking to the boys by torchlight.  It was something to see such a large group of 7-10 year old boys participating, quiet, and attentive for 30 minutes about very serious stuff. 
When vespers adjourns, we move on to campfire, which is in many ways the antithesis of the earlier event.  It is boisterous, silly, and fun.  It's always been a highlight of the weekend for me.   At this point I should probably mention that each year we have a theme for Cub Scout camps, and this year's was dinosaurs/fossils.   The theme is used in event patches and staff T-shirts, the nature and craft programs, and most importantly at campfire.  Each pack presents its own song, skit, or joke, most of which tie in to the event theme.  In addition, the staff provides a theme oriented backdrop to tie everything together.  This year was "Dino Labs."  The back story was they had found a dino egg, and were trying to hatch it.  To do so required bad jokes and laughter - which we had plenty of!  The program was a blast, and we enjoyed ourselves immensely for the better part of an hour and a half before returning to our site. 
The night winds up with a brief campfire in our site.  This is a chance for our boys to enjoy a few s'mores and some quiet time before bed (and for adults to finish dinnertime cleanup).  Unlike most camping trips I've been on, there is very little bedtime chatter at Funpack weekend.  Everyone crashes quite quickly.
On Sunday morning, we close out with our final three activities.  Unfortunately we drew the dreaded 8 AM swim rotation this year and the weather featured some "liquid sunshine" (rain), but it's always pleasing to see everyone put their happy faces on and make the best of it. Prior to closing, there is also a final silly moment as the adult leaders of boys who lost things over the weekend have to perform "I'm a Little Teapot" for the boys to reclaim their stuff, followed by flag retreat on the waterfront.  Then we load up our gear and head home.
Putting on such an event is an astounding amount of work for the all volunteer staff and I want to thank the Casco Bay District volunteers who put on this weekend's festivities.  They did a great job, and we had a blast.  Also, thank you to the boys and parents who came with me - it was a pleasure coordinating our pack's contingent this year.  If you're involved with Cub Scouts and have never been to a Funpack weekend, I encourage you to put it on the agenda for next summer as part of your effort to "keep the outing in scouting."  

Thursday, August 4, 2011

Family Camping at Papoose Pond Resort and Campground

Most people associate Maine with its coastline, which is very beautiful but very busy in the summer months.  By far, our favorite region of Maine for camping is the Western Maine mountains and lakes.  There is less traffic and less hustle and bustle, and for me, that makes for a more relaxing vacation.  There are a large number of campgrounds within an hour and a half or so of our home on some very beautiful lakes, with plenty of nearby mountains for easy to moderate hikes that are perfect for the family.
 
Last week, we went camping with some friends at Papoose Pond Resort and Campground in the Town of Waterford.  Except for a pair of overnight rainstorms, the weather was very pleasant and it was a good week for camping.  This was our first time at this campground, which offers many amenities and seems to be structured to cater to the camper who is staying for a week or two.  We didn't see evidence of the semi-permanent seasonal campers there that are so common in many Maine campgrounds.

Sites and Site Amenities

Papoose Pond offers a wide variety of site configurations to meet the needs of the traveler.  As you'd expect, these include your typical primitive tent sites with fire pit, picnic table, and community water, and trailer sites with three way hookups, picnic table, and fireplace.  Also like many competing campgrounds, Papoose offers rental cabins, but there were more available here than at many other campgrounds I've been to.  If you prefer cabin camping to setting up a tent, this is worthy of checking out.

The picnic shelter in a Kit-N-Bath site.
What was really interesting, though, was the sites in between the "basic" site and the cabin.  On the urging of our friends, we tried out one of Papoose Pond's Kit-n-Bath sites.  These sites have a wooden picnic shelter that is open on three sides (see photo).  One end of this open area is enclosed with open shelves to stash your cooking gear and a counter with a sink, electric cook-top, and outlets.  In behind was a full bathroom with shower, toilet and sink.   For someone who's tenting like we were, this was a pretty remarkable convenience.    As an outdoor cooking enthusiast, I would have been happy using my Coleman Propane stove instead of the cooktop, but the sink with hot and cold running water was awesome for cleanup.  Papoose offers a number of variations on this theme, including sites with covered shelters without power and water, kitchen and bath without a covered picnic table, and even a site with a tree house and a picnic shelter.

Programming and Activities

Papoose Pond has more structured activities and events than we are used to seeing at the campgrounds we frequent.  There were planned sporting events, crafts, and social activities every hour during the day, and movies, concerts, and social events in the evening.  We tend to like to move at our own pace when camping so we didn't partake of many of these events.  We did attend Sunday evening's Rick Charette concert and take advantage of the make your own ice cream sundae special, and our oldest son attended one of two teen dances held that week.  Other than that, the two events we were most interested in, the Pulpit Rock Hike and the Crooked River Canoe Trip left at 9:00 AM - which was earlier than we were ready to hit the road after breakfast each day.  Overall, though, they seemed to offer a wide variety of activities, with something for everyone.

Other Campground Amenities

The campground features a swimming pool and a considerable sandy beach area on the pond with swimming and a fair number of rental canoes, kayaks, and paddle boats.  The pond was small though, so we chose not to use the boats, and instead put our power boat in at the public landing at nearby lake Pennesseewassee in Norway for an afternoon of tubing.  Fishing was somewhat restricted to the "Fishing Lagoon," so fishing, again was done off-site for us.  In addition to the usual camp store there is cafe for fast food favorites and a snack bar near the pool and rec hall. There were a couple of playgrounds for the kids, which seemed a bit small and under-equipped for the size of the campground.  Our youngest enjoyed a couple of games of mini-golf with friends however, and the volleyball court, baseball diamond, and other sporting facilities were frequently busy.  Lastly, on a more mundane level the bath houses, to the extent we had to use them, were clean and well supplied.

Overall we enjoyed our stay at Papoose Pond.  The site amenities were a nice change of pace that made for a relaxing stay and our kids enjoyed the beach.  If you plan to go - I suggest bringing a bicylce.  The campground is quite large and  getting around can be tedious on foot.  Happy camping!

Sunday, July 31, 2011

Hello and Welcome!

Welcome to Maine Outdoor Living.  I'm excited to share my passion for the outdoors with you, and in the coming weeks and months, I hope you find a few things worth trying yourself, wherever you live.  I plan to write articles on hiking, boating, camping and fishing in the Maine Coast and Maine Mountains, of course, but I do expect to talk about some of my favorite tips, tricks, and gear that you can use anywhere.  I also expect to write many articles about two of my biggest outdoor passions that apply anywhere:  outdoor cooking, especially with dutch ovens, and Boy Scouting, a program in which I spent 9 years as a youth, reaching the rank of Eagle Scout.  I have now spent more than 7 years as an adult scouting volunteer and have a file cabinet full of successful past projects and outings that I'm anxious to share.

I considered taking a more narrow approach to this blog and publishing just about cooking, for instance.  The more I thought about it, though, the more I felt that a more generalist outdoor blog would be better.  For one thing, it's important that I have something to share regularly year round.  Putting together photos for a dutch oven blog in a Maine January could be a bit difficult, given our high winds and cold temps.  I'll have a greater volume of content to share covering a broader range of material.  I also figured it would make for more interesting reading to have a different outdoor related topic each week.  Lastly, it'll be more "Maine" to have articles that reflect the seasonality of out state.  There is something great to do outdoors in Maine every month of the year, and I'd like this blog to reflect that.

By the way, one thing you won't find articles on here is hunting, because I've never taken up the sport.   Like most Mainers, I view controlled hunting as a positive thing, helping to maintain healthy wildlife populations.  I've just never taken an interest in participating.  I do love fishing, though, so you'll see a few posts on that.

So that's my brief introduction to Maine Outdoor Living.  Please check back frequently, and try one or two of these things yourself.  Share your comments, success stories and feedback.  Most of all, get outdoors!

Cheesy Potatoes with Sausage and Roasted Red Peppers

Sometimes you try a recipe that you can tell has great potential, but something is missing.  That happened to me with a recipe from Cast Iro...