Monday, December 16, 2013

Cabin Camping at Camp Bomazeen

Recently, I had the opportunity to lead a group of Boy Scouts from Troop 817 on a cabin camping excursion to Camp Bomazeen, a Pine Tree Council camp on Great Pond in Belgrade, ME. 

While planning for the trip, I spent a fair amount of time looking online for information about the camp, which I had never been to. Unfortunately, there isn't much information about Camp Bomazeen on either the Pine Tree Council website or elsewhere online, so I thought I would share a bit of what I observed on our trip here.

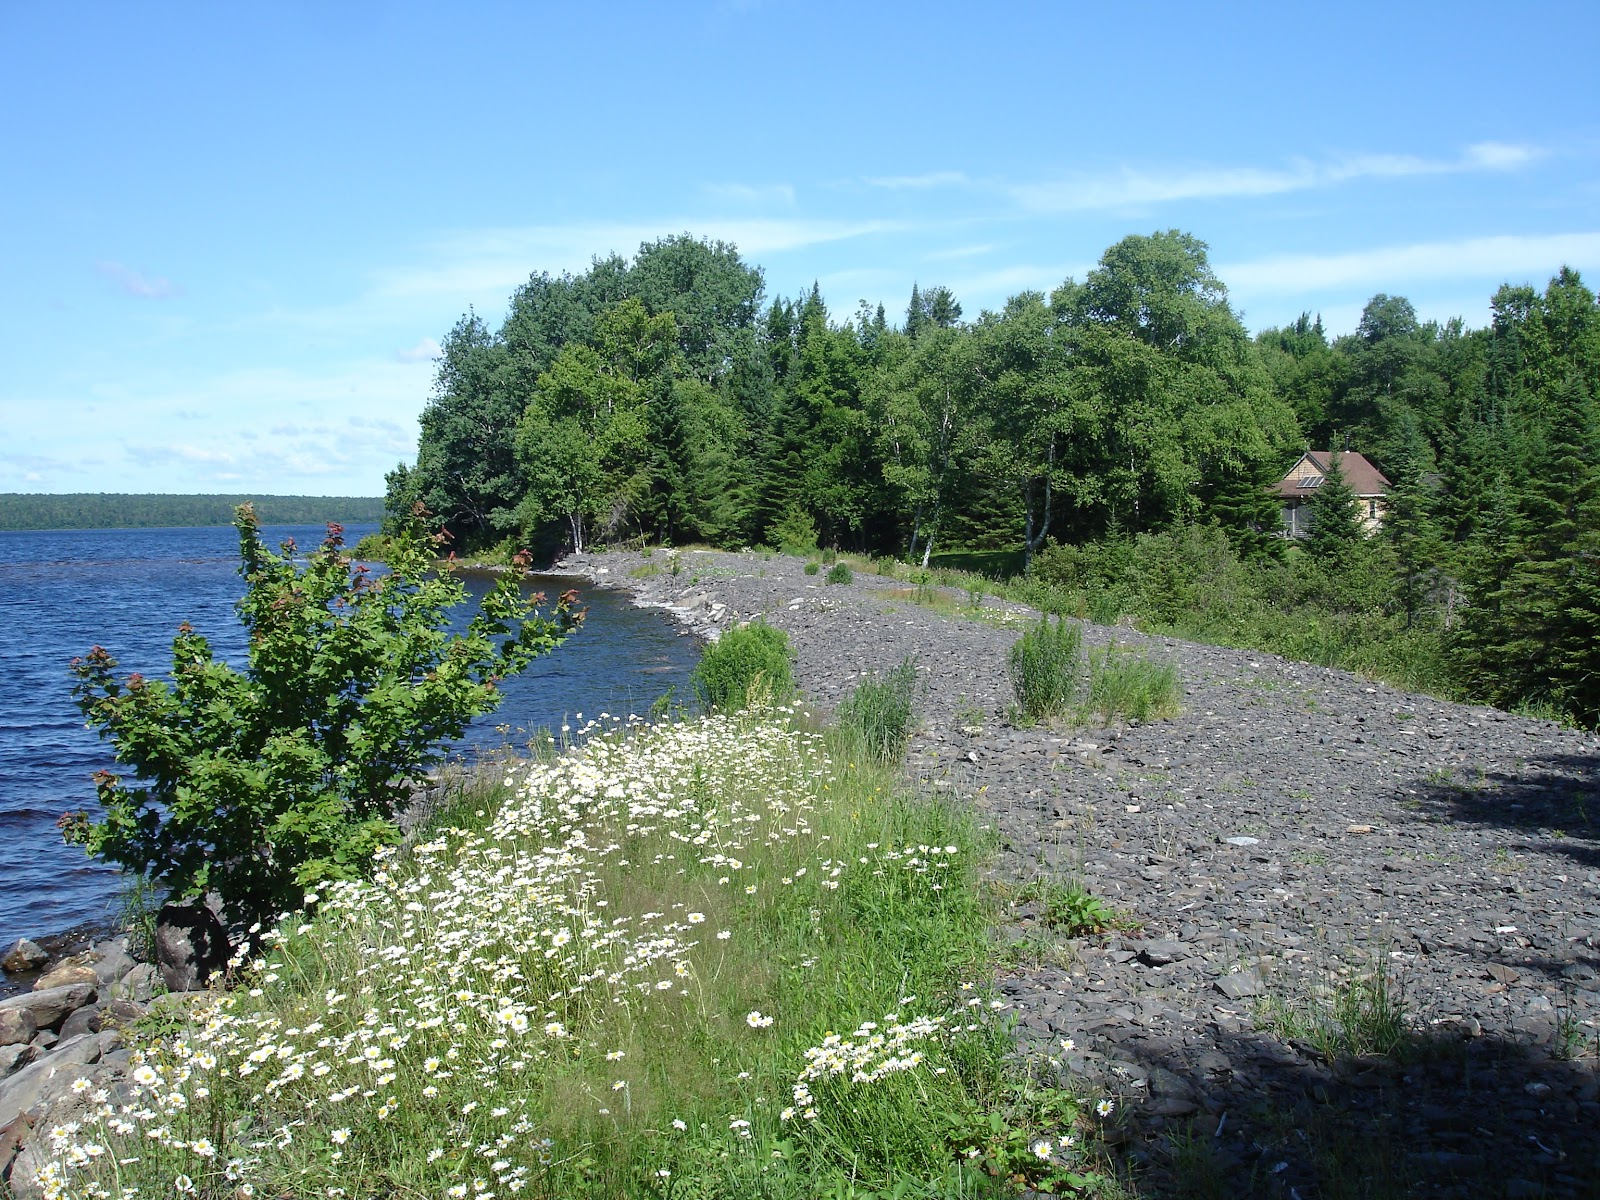
Camp Bomazeen is on Horse Point Road in Belgrade.  It's actually situated between privately owned houses which made for an interesting experience on this trip when one of our non-scouting neighbors had a rather large late-night housewarming party.  The camp includes considerable waterfront with terrific views of Great Pond.


A view of the main waterfront at Camp Bomazeen, just out the front door of McCurdy Lodge.


Facilities


McCurdy Lodge

We stayed the weekend in McCurdy Lodge which is one of two cabins on the site equipped with wood stoves for winter camping.  I didn't count the bunks, but according to the Council's weekend rental form, this cabin sleeps 28.  It includes a large wood stove that was plenty to heat the cabin on the very cold and windy weekend we were there. The cabin also has a fireplace-wood stove conversion that we didn't use.

This large woodstove is the primary hear source in McCurdy Lodge at camp Bomazeen.

You do have to supply your own firewood. There is a latrine behind the cabin with electric lights an separate facilities for males and females. The cabin is also appointed with picnic tables, electric lights and enough outlets for adults to keep their phones charged.

We enjoyed our stay in McCurdy, my only cautions for groups staying here are:
  • There is no outside fire ring and the fireplace is closed up, which posed some challenges for us doing Dutch Oven cooking and we had to improvise.
  • There is only one room, which can be problematic if you're trying to adhere to the Guide to Safe Scouting's requirements for separate sleeping accommodations for males and females.

McCurdy Lodge from the North. The latrine is on the far left of the photo.

As I mentioned, the fireplace has been filled up with a plate-style conversion stove (below).  Given that the cabin's main stove was plenty to heat the place, I'd have preferred this left open for that open fire feel and a place to cook with the Dutch Ovens out of the wind.

One thing units should be sure to do is create a plaque commemorating their stay.  I hadn't planned on this and ended up carving one into a piece of scrap lumber. (Another leader traced my carving with a black Sharpie - see the below photo at top right). It's really fun to see these plaques scattered around the cabin and look for units and scouts that you know.


Pavilion Cabin

Pavilion is the smaller of the two winter cabins.  It sleeps 16 and features a walled-off second room to accommodate separate sleeping accommodations for females as required by Guide to Safe Scouting rules. We were originally supposed to be in this cabin but were relocated by the camp ranger because it is marginally further from the road than McCurdy and the camp roads were not in the best shape.

This unit is heated by a single wood stove and has electricity.  It's a short walk to the nearest latrine facilities.


Troops like ours that have camped quite a lot at Camp Hinds in Raymond or Camp Nutter in Acton could definitely enjoy the change of scenery at Camp Bomazeen.  I only wish that the weather had been less windy when we were there so we could have enjoyed more time out and about.  Happy camping!

Sunday, November 17, 2013

How to Make a Simple Hobo Stove

It's name may not be politically correct, but "thrifty" scouts will appreciate the hobo stove for its economy.  It is made entirely from cast-off materials with simple tools and requires very little fuel to cook simple meals.  It's a time-honored cooking technique used by the homeless, hobos, backpackers and in survival situations.

Hobo stoves can be quite elaborate.  My simple hobo stove can be made by young scouts as a project a scout meeting. 

Materials & Tools


The tools and materials needed are simple:

  • A puncture-type can opener (see photo)
  • A hammer
  • A spike or large nail
  • An aluminum 3# coffee can or #10 aluminum can.
  • A small scrap of wire mesh or chicken wire
  • A vise and a 15-18" 2x4 are helpful as well


 Step 1: Create vents at the top and bottom of the hobo stove.


Using the can opener, create several openings around both the closed end and the open end of the can.  These will provide both the necessary oxygen supply at the bottom and a "chimney" at the top to allow smoke to escape.  More openings are better, so take your time.
Making vent holes in the base of the hobo stove.


Step 2: Create vents along the side walls of the hobo stove.


Put your length of 2x4 in the vise with most of the extra length sticking out on one side.  This will be used as a support for your can.  Then using the hammer and nail, create extra vent holes in whatever design you like along the sides of the can.  These provide some additional airflow as well as an opportunity to decorate your stove. 

Using a hammer and nail, punch additional vent holes in the sidewalls
of your hobo stove.

Step 3: Use your wire mesh to create a "grille" for the hobo stove.


Since your cookware will most likely entirely cover the mouth of the can, the grille may not seem as though it is a necessity.  On the other hand, it does provide some separation between the can and cookware and an additional route for smoke to escape.

For a grille, fold your wire mesh, chicken wire, or even an old wire coat hanger into a square-ish shape a little larger than the top of the can.  This simply rests on the top of the can under the cookware.

This photo shows finished stove, grille, and cookware.

Step 4: Fueling the hobo stove.

The fuel for the hobo stove would make scant kindling for your typical cook-fire.  Small twigs, small pieces and/or very small pieces of scrap lumber are all that is needed.  This small pile was more than enough to cook a simple meal, and I ended up burning off the rest just to clean up the mess.


Fuel for the hobo stove consists of small scraps and twigs.

Step 5: Final preparation.

If you've never cooked over an open fire before, fair warning! Your cookware gets very black and the soot can be very hard to remove.  Applying a little dish detergent to the outside of your cooking pan beforehand and spreading it over the entire surface with your fingers will make a huge difference at  clean-up time.


Applying dish detergent to the outside of cookware helps keep soot from
permanently ruining cookware. 


Time to cook on your hobo stove!

Kindle a small fire in the can. (I used a single sheet of newspaper as tinder and lit it through one of the vent holes.) 


Once the fire is burning well, it's time to cook!

You can cook almost any simple meal on your hobo stove.  In this example, I'm frying hot dogs and onions in a little margarine.  I've also done baked beans and hot dogs on the hobo stove as well as making boxed rice dishes (such as Rice-a-Roni or Zataran's).  You may need to add fuel from time to time.  Be careful to handle your grille with a mitt or stick.  It can get quite hot!


Hot dogs and onions cooking on a hobo stove.

This is one of those easy and fun projects, like the cardboard box oven, which fascinates scouts for its simplicity and highlights how cooking can be accomplished without fancy, expensive, heavy cooking equipment. 


Sunday, November 3, 2013

Dutch Oven Kielbasa with "Both Potatoes"

I got the recipe for this Dutch Oven one-pot meal from the scoutmaster of another local boy scout troop several years ago, and have been making it ever since for both family meals and scouting events. It's quick, easy and popular with both boys and adults for its sweet and savory flavor and cooks up in 40 minutes or so in a #12 deep dish Dutch Oven (8Qt.)

This Dutch Oven recipe featuring low-fat turkey kielbasa is as easy as it gets.


Ingredients

  • 3-4 medium white potatoes.
  • 2 sweet potatoes.
  • 1 large onion, sliced into rings.
  • 1 turkey kielbasa
  • 4 tbsp. margarine
  • 2-3 tbsp. brown sugar
  • salt and pepper


Directions

There isn't much mystery to this meal, which makes it perfect for the kids to take the lead on.  You just peel and slice your potatoes (the thinner they are, the faster they cook), onions, and kielbasa and put them in the oven.  Sprinkle with salt and pepper and toss to mix.  Then, add the butter in 4 or 5 pats to the top and sprinkle with brown sugar.  For an additional veggie, carrots make a great addition to this Dutch Oven one-pot meal.

In 72 degree weather with calm winds, I'd add maybe 12 coals underneath and 16 above (temp of 375 or so) and cook for 40 minutes or until the potatoes and onions are tender,

Serves 6.

Bigger group?  Double the ingredients in your #14 deep dish oven.

Saturday, October 19, 2013

Two Ways to Hike Rattlesnake Mountain in Raymond

Rattlesnake Mountain is the most common hike done by hundreds of Boy Scouts camping at Camp William Hinds in Raymond, ME each year.  A climb up the mountain can afford some good easy-intermediate hiking and nice views of the surrounding lakes including Panther Pond, Thomas Pond, Crescent Lake and Sebago Lake.  It's also a good family day hike that I highly recommend to anyone spending a few days in the Lakes Region.

This year, I climbed Rattlesnake twice with my youngest son and other boys from troop 817.  We used two different routes to summit the mountain and climbed at two very different times of year.  The two experiences each offered their own unique features, but I thought I'd present them together.  Both trails are depicted on the map below, and a detailed description of our excursions follow.


Our April hike followed the route marked in blue, while the fall hike followed the Bri-Mar trail, marked in red.


The Nubble Pond Trail


We first climbed Rattlesnake Mountain in late April, on a cool, sunny spring weekend before any leaves were on the trees.  We are at Camp Hinds for a weekend camping trip at which we focus on advancement activities for the Tenderfoot and Second Class ranks.  As it happens, a five mile hike is one of the requirements for Second Class.

For our five miler, we started in the parking lot across the street from the Messer Rotary Scout Training Center on Plains Road, and hiked down Plains Road to the trailhead (below). Right away, you notice the snowmobile signs and the sign that indicates the trail is on the property of Kingsley Pines camp.


One of the first things I noticed as I headed down the trail was a small brook to our right, which turned out to be the outlet of Nubble Pond.


Nubble Pond


A little further on, we came to Nubble Pond, which is a beautiful small pond with some very interesting cliff faces along its eastern shore.  We got a good view of them as we hiked along the western shore of the pond. And took a short break to enjoy the view at the Northwest corner.


The real climb began.  The trail, which is used by snowmobiles in winter, is quite wide and begins gradually at first, getting steeper as you continue up the mountain.  At its steepest points, you find yourself grasping trees to help pull yourself up, but nevertheless the hike was manageable for our eleven year olds. 

Overlooks


We ended up stopping short of the summit, which is tree-covered anyway and paused to enjoy the view from a granite ledge close to the summit.  My photos from here are not the best, but you get a door view of Panther Pond and Thomas Pond from here, as well as a view of Sebago Lake in the distance.


We hiked back to the Training Center along our original route.  In all we covered about 4.85 miles - close enough for the boys to have completed their requirements. 


The Bri-Mar Trail

 
In September, we hiked a shorter trail called the Bri-Mar Trail.  Whereas the Nubble Pond trail is accessible from the Plains Road, this trail is accessed from further north along Rte. 85.  The trailhead is in a hay on your left as you head North, and a sign in the small parking area explains that the land is owned by the Huntress family and the trail is named for Brian and Marlene Huntress, who used to hike there.
 

Hitting the Trail


After the short walk across the field, you enter the woods, and enjoy a nice walk through the trees before. The trail forks a short distance in, affording you the option of a longer, more gradual slope or a shorted uphill climb.  Take your pick, the two trails converge not too far on.
 

After the trails come back together, you come quite quickly upon an extended steep incline.  You gain most of the altitude you're going to climb on this stretch, so take breaks when needed. 
 
As you near the top, things level off almost as suddenly as the incline increased at the bottom.  You do encounter a number of downed trees that need to be climbed over, but for this stretch the inclines are modest and down-hills come almost as frequently as up-hills.
 

Overlook

 
As you near the top there is a fantastic overlook with wide open views of Crystal Lake, Panther Pond and Thomas Pond.  I'm afraid this panorama taken on my iPhone just doesn't do it justice.  If what you're looking for in climbing Rattlesnake is a great view, this route definitely offers the best.


We hiked on a bit further until the our routes converged near the location of the overlook we'd visited in the spring.  It was actually remarkable to note the difference with the leaves on the trees.  We debated splitting up because a few of the boys wanted to hike out on the trail we had used in the spring.  Unfortunately, we lacked adequate adult supervision to split into two groups, so we went back the way we came. 
 
In all, this hike was much shorter than the first - a round trip of about 2.5 miles.  It made for a great afternoon hike however, and was perfect for the time we had available. 
 
Both trails are great.  If you can leave vehicles at each end of the trail and hike the whole thing, I'd definitely try that.  If not, the Bri-Mar trail is probably the one I would do first, since it offers the best overall view and is a shade better marked.


Monday, August 26, 2013

Chicken Dutchilladas: Mexican Inspired Camp Cooking


In addition to being big fans of Dutch Oven cooking, we love Mexican food. This recipe for Chicken Dutchilladas gives us the opportunity to combine the two and enjoy a Mexican inspired meal while camping, beyond the basic quesadilla.

The original recipe was Scouting magazine's grand price winner in a Dutch Oven main dish recipe contest a few years back.  Mine uses red enchilada sauce instead of green sauce and reduces the quantity of  sour cream.  We like the red sauce better and find that the reduced amount of sour cream helps the dish hold together better when cut.


Chicken Dutchilladas (right) and Chocolate Lava Cake near completion.


Ingredients:
  • 3 Boneless skinless chicken breasts, pre-cooked and shredded
  • 1 Large can red enchilada sauce
  • 12 Tortillas (corn or flour)
  • Cooking spray or vegetable oil
  • 1 Cup sour cream
  • 1 Package dry ranch dressing mix
  • 3 Cups shredded Mexican blend cheese
  • 1/2 Cup black olives, sliced

You'll also need:
  • #12 Deep dish (8 qt.) Dutch Oven
  • Oven liners or aluminum foil
  • Griddle or frying pan
  • Paper towels

Start by browning the tortillas in cooking spray or oil on the stovetop.  A griddle works best because you can do two at a time, and I find the process time consuming otherwise.  When you're about halfway through this process, pause to start your briquettes. Then complete the process of browning tortillas.

Next combine your pre-cooked chicken, olives, sour cream, ranch dressing, about 1/3 of the sauce  and about 1/3 of the shredded cheese in a bowl and mix.

Put liner papers or tinfoil in the bottom of your Dutch Oven.  This will aid removal of the meal from the oven later on and also speed clean up.  Wet the bottom of the liner paper with a little red sauce and the layer 3 tortillas with a small amount of red sauce between each. Then spread one layer of the chicken mix, and top with a little cheese.  Repeat this process two more times, until the chicken mix is gone.  Then top with three more tortillas, remaining sauce and remaining cheese.

Bake in a 350 degree Dutch Oven for 30 minutes or until the meal is hot all the way through and cheese is melted.

Remove from the oven and slice into wedge-shaped servings.   Enjoy!

Saturday, September 15, 2012

Pie Iron Pizzas are a Fun Way to Get Kids Involved in Outdoor Cooking

An important component of getting children involved in the outdoor cooking process is making it fun. We learned this one at Cub Scout Day Camp a few years back, and we've found it to be a really fun and easy before dinner snack around the campfire even now that the boys are older.

What You'll Need

The ingredients and tools for this one are simple:
  • A pie iron (or one for each kid if you can)
  • A tube of ready-made biscuit dough (the smaller variety, not "Grands")
  • Ragu Pizza Quick or similar pizza sauce
  • Shredded mozzarella
  • Your favorite toppings
  • A spoon
  • Cooking spray
You'll want to have a good fire going for a while before you start, so that you have a decent bed of coals to cook on.  If you can't have a campfire where you are, this works on charcoal briquettes as well.

Step 1. Spray the inside of your pie iron with cooking spray. Open your tube of biscuit dough and flatten 1 of the biscuits, then put it in the pie iron and close.


Step 2. Place your pie iron in the fire on the hot coals. Let cook just a couple of minutes, then turn your pizza crust over to cook the other side.  It's usually best to check for donness frequently, because temps on a wood fire can be pretty hot.  You'll also find that the first pizza takes longer than later ones, so be careful not to burn your second helping.


Step 3.  Add sauce, cheese, and toppings and you're done. Enjoy!


Saturday, September 1, 2012

Canoeing the Headwaters of the Allagash Wilderness Waterway


Recently, I had the opportunity to take a 50+ mile canoe trek along the Allagash Wilderness Waterway with 7 Boy Scouts and two other adults.

Since no one on the trek was experienced in planning a lengthy trip such as this one, we decided to go through Maine High Adventure, a wilderness camping program for scouting groups sponsored by the Katahdin Area Council and run out of its base at Grand Lake Matagamon. The base provided most of the required equipment and food, a guide, and help planning the trip. In addition to the Allagash route we chose, the base offers several other treks including the East and West Branches of the Penobscot River, the Aroostook River, and other less traveled routes in the Maine North Woods.

Day 1 Outfitting and Shakedown


We spent our first day at the Maine High Adventure base getting outfitted, planning our trek, and refreshing our canoe skills. We then settled in for the night at one of the base’s “trailbound” campsites, and spent a little time cliff jumping in the evening.

Day 2 Chamberlain Thoroughfare


The next morning we paddled our canoes across Grand Lake Matagamon to start our journey. Upon reaching the landing we loaded our gear into the van for the 3+ hour ride to Chamberlain Thoroughfare. We saw a moose and several deer in the early part of the drive, which involved driving around Baxter State Park to Millinocket. We then used lumbering roads to head into the North Woods: First the Golden Road, and then the Telos Road. Finally, we reached the Chamberlain Ranger Station and had lunch at the landing before making the short paddle to our first campsite.  

Originally we had intended to stop at the “Boy Scout” campsite on Chamberlain Thoroughfare. This site, originally constructed exclusively for scout use, is now open to the public. Interestingly, however, it was occupied and we had to relocate to “Thoroughfare” campsite, an adjustment that is apparently common on the Allagash where all sites are first-come, first-served, but it was the only such adjustment we had to make. We spent the afternoon in the water around the site, swimming and fishing.

Day 3 Chamberlain Lake


For our first full paddling day, we had planned an 8 mile paddle northwest along Chamberlain Lake. We set out early in the morning paddling up the rest of the Thoroughfare, and I paused once or twice to take photos of the great views of Katadhin and The Travelers at our backs.


Unfortunately, when we reached the main body of Chamberlain Lake we were met with a strong headwind out of the northwest with gusts of 15-20mph. This slowed our progress. We hugged the shoreline for the first four miles, stopping several times at campsites on the shore and reached Gravel Beach campsite after a few hours, for a snack break.

Upon leaving Gravel Beach, we decided to try paddling into the wind to a point a couple of miles up the lake. A few days later with better balanced crews this might have worked, but unfortunately our stronger crews found themselves stopping frequently to wait for our weaker teams, and eventually we had to turn back toward Gravel Beach, where we set up camp in hopes of better weather to come.

Day 4 Chamberlain Lake to Eagle Lake


The next day was sunnier,but high winds still hampered our progress. This time we hugged Chamberlain's western shore to stay sheltered from the wind and made good progress. We stopped at a pebble beach along the route for a break and saw moose tracks on the beach, then pressed on, easily making our prior day's goal while it was still quite early in the morning.

While we were parked along shore for a brief hydration break, the ranger stopped to chat with us, and we ended up hitching a ride with him across the lake to Lock Dam. We loaded first the packs, then the canoes onto his center console power boat, and he carried us across two canoes at a time.

It's easy to look back and say that we should have made the crossing, but the prior day's experience was fresh in our minds and we had 12 miles to cover that day. It’s important to understand your crew's limitations, and the ranger was pretty clear that he’d rather help us out this way than rescue us if we got into trouble. It's an important lesson for everyone to avoid letting your pride get in the way of a safe and successful trip. 

Lock Dam

An interesting feature of Day 4 was our brief visit to Lock Dam. This dam was originally built to reverse the flow of water from Chamberlain Lake, sending lumber south to Bangor’s mills instead of north to Canada. Later, locks were added here to lift lumber from nearby Eagle Lake, but were discontinued after a few years in favor of a mechanical tramway. Almost no sign of the locks are visible today other than the lock keeper’s cabin, which now serves as a ranger’s cabin.
The earthen "Lock Dam" was built to send lumber south.

After a short portage around the dam, we continued on to Eagle Lake for another lengthy paddle, hugging the shoreline. Due to a miscommunication, we missed our intended stop at The Tramway, but made it to Hidden Pine campsite by 5:30 PM, getting us back on schedule with our trek plan.

Hidden Pine is one of the roughest campsites we experienced on the entire trek, offering very little level ground to pitch your tent. If you find yourself in the area, I highly recommend the short additional paddle to Priestly Point, just a few hundred yards further along the trail.

Day 5 Eagle Lake to Churchill Lake


Beginning on this, our third serious paddling day, traveled smaller lakes with markedly calmer winds. The calmer water conditions afforded us more opportunities for viewing wildlife, fishing, and photography than we had experienced before. We saw several eagles in flight and fishing on this day, which were unfortunately too fast moving and too distant to capture with my compact camera. 

It's difficult to make out the fishing bald eagle above and to the right of the red canoe.

We made an early stop at Little Eagle campsite to check our maps, and found that the last camper had made quite a mess in the site, leaving beer bottles and the remnants of fireworks, which are illegal in the North Woods, all around the site.  Our scouts spent some time cleaning these up before moving on.

We also paused on the shore of Churchill Lake for an attempt at canoe sailing. This process involves using canoe poles (yes, I said poles, see a video of a Maine Guide canoe poling) and ropes, together with our dining fly, to sail four “rafted” canoes. This was the first time on the trip we’d had the wind at our backs, but unfortunately they were inconsistent and gusty, making for poor sailing, and our attempt was short-lived. 

Our brief attempt at Canoe Sailing.

We landed at The Jaws campsite quite early in the day. Unlike the prior night, this was one of the best sites we encountered, featuring three distinct campsites, all of which were level and grassy, and a broad sandy beach, where our crew enjoyed a swim and canoe swamping contest. We also had our best moose sighting (a Cow and Calf) since our van ride on day 2.

Day 6 Churchill Lake to Umsaskis Lake


We set off early the next morning for the short paddle from The Jaws to Churchill Dam in order to be at the head of the line to run the rapids on the Allagash River. The water was very calm that morning and we were fairly close to a moose and several loons in the mile or so we had to travel.

A cow moose feeding at Churchill Lake
Scout and Scouter pause to observe wildlife.

The rangers at this site offer a portage service. For $10, they haul your gear past the rapids so that you can run the whitewater without risking damage or loss of your gear. We took advantage of this service, then portaged our canoes and safety gear around the dam. We had about 45 minutes to wait after the dam had been opened for the day, and during the wait, we saw three moose, including a cow and calf swimming across the lake above the dam.

Moose above Churchill Dam.

Moose swimming above Churchill Dam.

When we got the all clear, we pushed off. This stretch of the Allagash has about a mile of class 2 whitewater, followed by another three miles of class 1 whitewater and quick water. In spite of being whitewater novices, we weathered the water without taking an unintended swim. Whitewater paddling is a lot of fun. If you've never tried it I'd encourage you to give it a go on a stretch like this with low to moderate difficulty and long enough to really get a feel for what it's all about. We then picked up our gear at the site of the washed-out Bisonette Bridge, and continued on through calmer waters into the twisty, almost swamp-like area where the Allagash feeds Umsaskis Lake.

Umsaskis itself is small and shallow compared to most of the lakes we traveled over our journey. As a result, we reached our final campsite, Sandy Point, early.  Two of this location's three camping areas are grassy and comfortable, although the third feels a bit like a gravel pit.  Fortunately, we were the first there and had our pick of sites and time for some much needed downtime before dinner. Although we didn't spot any moose at the site, we did see several jackrabbits, and signs that moose had been in the area.


Day 7 Return to Base 


On the final morning, the crew staged a short canoe race between the campsite and the bridge under the Realty Road, then put in at the ranger's station to wait for the van back to the base. This van ride followed logging roads to Ashland, and Route 11 from Ashland to Patten.

We made a short stop in Baxter State Park to cool off at some natural waterslides before getting out at the landing at Grand Lake Matagamon to paddle back to Maine High Adventure on the other side of the lake.

In all, our trek covered 53 miles including our two Matagamon crossings. Some days, we came off the trail exhausted and it seemed like we never had a chance to slow down.  Other days were calmer. I think it is those days the boys enjoyed most, because it gave them a chance to make the trip their own. 

Our full journey is shown in the map below.


Map of Our Trek


View Maine Outdoor Living Trails and Campgrounds in a larger map

View the South Branch Pond Trail Map

Sunday, June 3, 2012

Hiking and Rock-Hounding in Western Maine

Harvard, Tamminen, and Waisanen Quarries

Western Maine is a mineral rich area with rich deposits of amethyst and tourmaline as well as a variety of useful minerals such as mica, feldspar, and quartz.  As a result, the area has a number of interesting sites you can visit if you are interested in geology, history, or just a good hike.

One such group or quarries, owned by the Perham family, are in the area in and around Greenwood and West Paris.  At one time, the family owned a jewelry store at the corner of routes 26 and 219 in West Paris where you could pick up quarry maps and learn about the area's geology in addition to making a few purchases, but sadly the store has since closed.  You can download a pdf copy of the Perhams of West Paris Quarry Map.

We've visited Harvard Quarry, Tamminen Quarry, and Waisanen Quarry several times while camping at Littlefield Beaches Campground.  They are relatively easy to find, if a bit off the beaten track.  We've tried a few times to locate the Nubble Quarry as well, but have had no success finding the trail head. The Whispering Pines Quarry, while closer to the main road than the others, was further from our base camp, and we've never tried to visit it.

Visiting these quarries is a load of fun for young boys.  We've done it as a family outing and later brought Cub Scouts on a day trip here.  Bring a bucket, hammer, and safety classes, and perhaps a small shovel, and let them pick through the waste piles.  The boys bang away at the rocks and find "treasures" of their own. 

Below is a brief description of the three quarries we've visited as well as a few photos.  For more information on the quarries and directions on how to find them, download the Perham family quarry map.

Harvard Quarry

This quarry is my favorite of the three that we've visited for the scenic views available at the site and the short hike to get there - a twenty minute climb.

The trail to Harvard Quarry

View from Harvard Quarry

First developed in 1870, and mined by Harvard University in 1917, Harvard Quarry is known for its deposits of purple apatite, green tourmaline and black tourmaline, garnet, beryl, quartz and cookeite.  After visiting the quarry a couple of times with our boys we visited the Harvard Museum of Natural History in Cambridge, Massachusetts and seen samples  collected at the site.  It was nice for the kids to see the connection.

Waisanen Quarry

This quarry is just off the road, just two or three minutes walk on a gradual downhill.  It's usually filled with water, but the dump pile is fun for the kids to explore. 

Exploring the mine dump at Waisanen Quarry

This quarry was mined for mica and feldspar  starting in 1931.  Smoky quartz, purple apatite, bertrandite, gem quality tourmaline, and more have been found at the site by Frank Perham beginning in 1961. It lacks the great views available at the Harvard Quarry, but is great for its accessibility and the boys still enjoyed banging away at the rocks with their hammers looking for samples.

Tamminen Quarry

Just a tenth of a mile beyond the Waisanen Quarry, the Tamminen Quarry, this quarry is also very accessible. 

Tamminen Quarry was mined commercially for Feldspar beginning in 1930, and is named for the late Nestor Tamminen.  It features some really interesting quartz crystals as well as several other minerals.

Saturday, February 25, 2012

Make a Cardboard Box Reflector Oven

There's no surer way to impress Cub Scouts with outdoor cooking than to tell them you're going to bake their favorite treat in a cardboard box.

As outdoor cooking methods go this is more stunt than practical, but it does pique the interest of young Webelos and their parents and is actually quite easy to pull off. We usually make the oven in a den meeting, and cook in it the next week as part of our Outdoorsman activity badge.   Here's how you can make one:

Cardboard Box Oven Tools and Supplies
  • One cardboard box - approximately 22" x 15" x 11" 
  • Aluminum foil - Have a full roll on hand, although you may not need it all
  • A few heavy wire coat hangers
  • 1/4" light-duty staples (for a staple gun) separated from each other
  • Duct tape
  • 2 disposable aluminum pie plates
  • A utility knife or heavy scissors (for cutting cardboard)
  • A pair of heavy wire cutters or lineman's pliers

Making the Oven
1.       Start by cutting one of the short flaps on the open end of the box down to 2-3 inches.  This will be the top edge of your reflector oven.

The short flap will hold your doors closed.
2.       Cover the inside of the box with layers of foil as follows:

A.     Bend a short piece around the four corners of the side walls, a small amount should also overlap the back wall of the oven.  Secure by pushing staples through the foil by hand at an angle.

B.     Stretch long pieces from the outside of the short (top) flap to the outside of the opposite flap, carefully tucking the foil into the corners so that the entire top, back, and bottom of the oven are covered and about 3" of foil are wrapped around to the outside of the oven.  Be sure to overlap all pieces and leave no cardboard exposed.  Inside, attach by pushing staples though by hand.  Outside, secure the ends with duct tape.

C.      Stretch pieces from the outside of one long flap to the other long flap (side to side) being sure to overlap your pieces.  Tuck carefully into corners and secure with staples inside and duct tape outside.  The entire  inside of the box should now be covered in foil.

There should be no exposed cardboard inside the oven.

3.      Create a baking shelf about 1/3 of the way down from the top by straightening and cutting wire coat hangers into straight pieces and pushing them through the box from left to right.  Use a ruler to ensure that the shelf is the same distance from the top corner on each side and your baking pan is level.   Bend the ends of the wires to hold them in place.

4.      If the wires sag, you can strengthen the shelf by weaving a couple of additional wires from front to back of the oven through the wires installed in step 3.

The baking rack in the carboard box oven is
made with coat hangers.

5.  Place one pie plate upside down at the base of the oven, and the second one right-side up on top of it.  This will hold the charcoal briquettes that are used as a heat source.
The lower pan keeps the extreme heat from the briquettes
away from the flammable cardboard box oven floor.
6.  Close your long side flaps first, and use the shortened top flap to hold them closed.

Exterior of the completed oven.

You have a completed Cardboard Box Reflector Oven!

Baking in the  Cardboard Box Oven
In theory, you should be able to bake just about anything in this oven, with the only constraint being the oven's small size and lightweight construction, which will by no means support a heavy load.  I usually opt for simple items that are easy for the scouts to make, like brownies or cornbread from a pre-packaged mix. 

You may need to experiment with the heat, but usually I find that 4-6 briquettes preheated until they are mostly white are about right for 350 degrees on a New England summer day. Preheat these outside the oven and then place these in the top pie plate and your baked goods on the rack in a disposable foil pan. A small shovel can be used to transfer preheated coals into the oven.

Cheesy Potatoes with Sausage and Roasted Red Peppers

Sometimes you try a recipe that you can tell has great potential, but something is missing.  That happened to me with a recipe from Cast Iro...